


























Important: Check your payment details
Before confirming any payment, carefully verify the recipient’s name and bank account number. Payments will be processed using the bank details provided.
One currency per batch
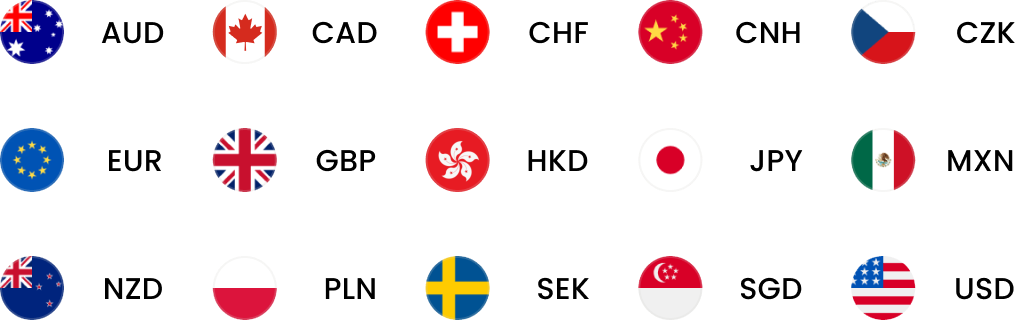
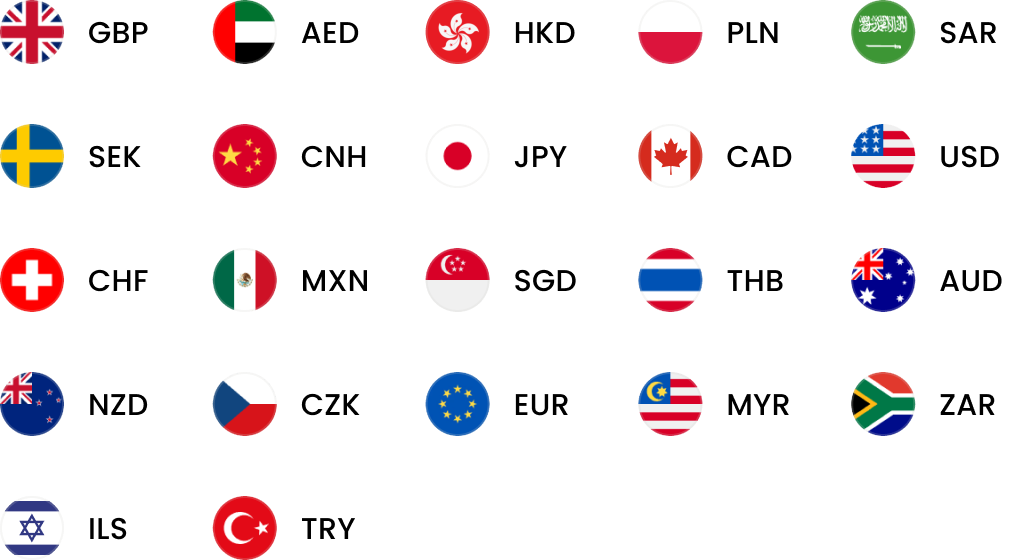
Each batch upload can contain payments in one currency only. If you need to make payments in multiple currencies, please create and upload a separate batch for each currency.
Introduction to mass payments
You can make payments to multiple payees through the WorldFirst portal or by uploading an Excel file. Choose an option based on the number of payments and whether you want to schedule them or process them immediately.
Step 1: Add your payees
- Before making a mass payment, add the people or businesses you want to pay to your WorldFirst account.
- You can add them individually or upload multiple payees using an Excel template.
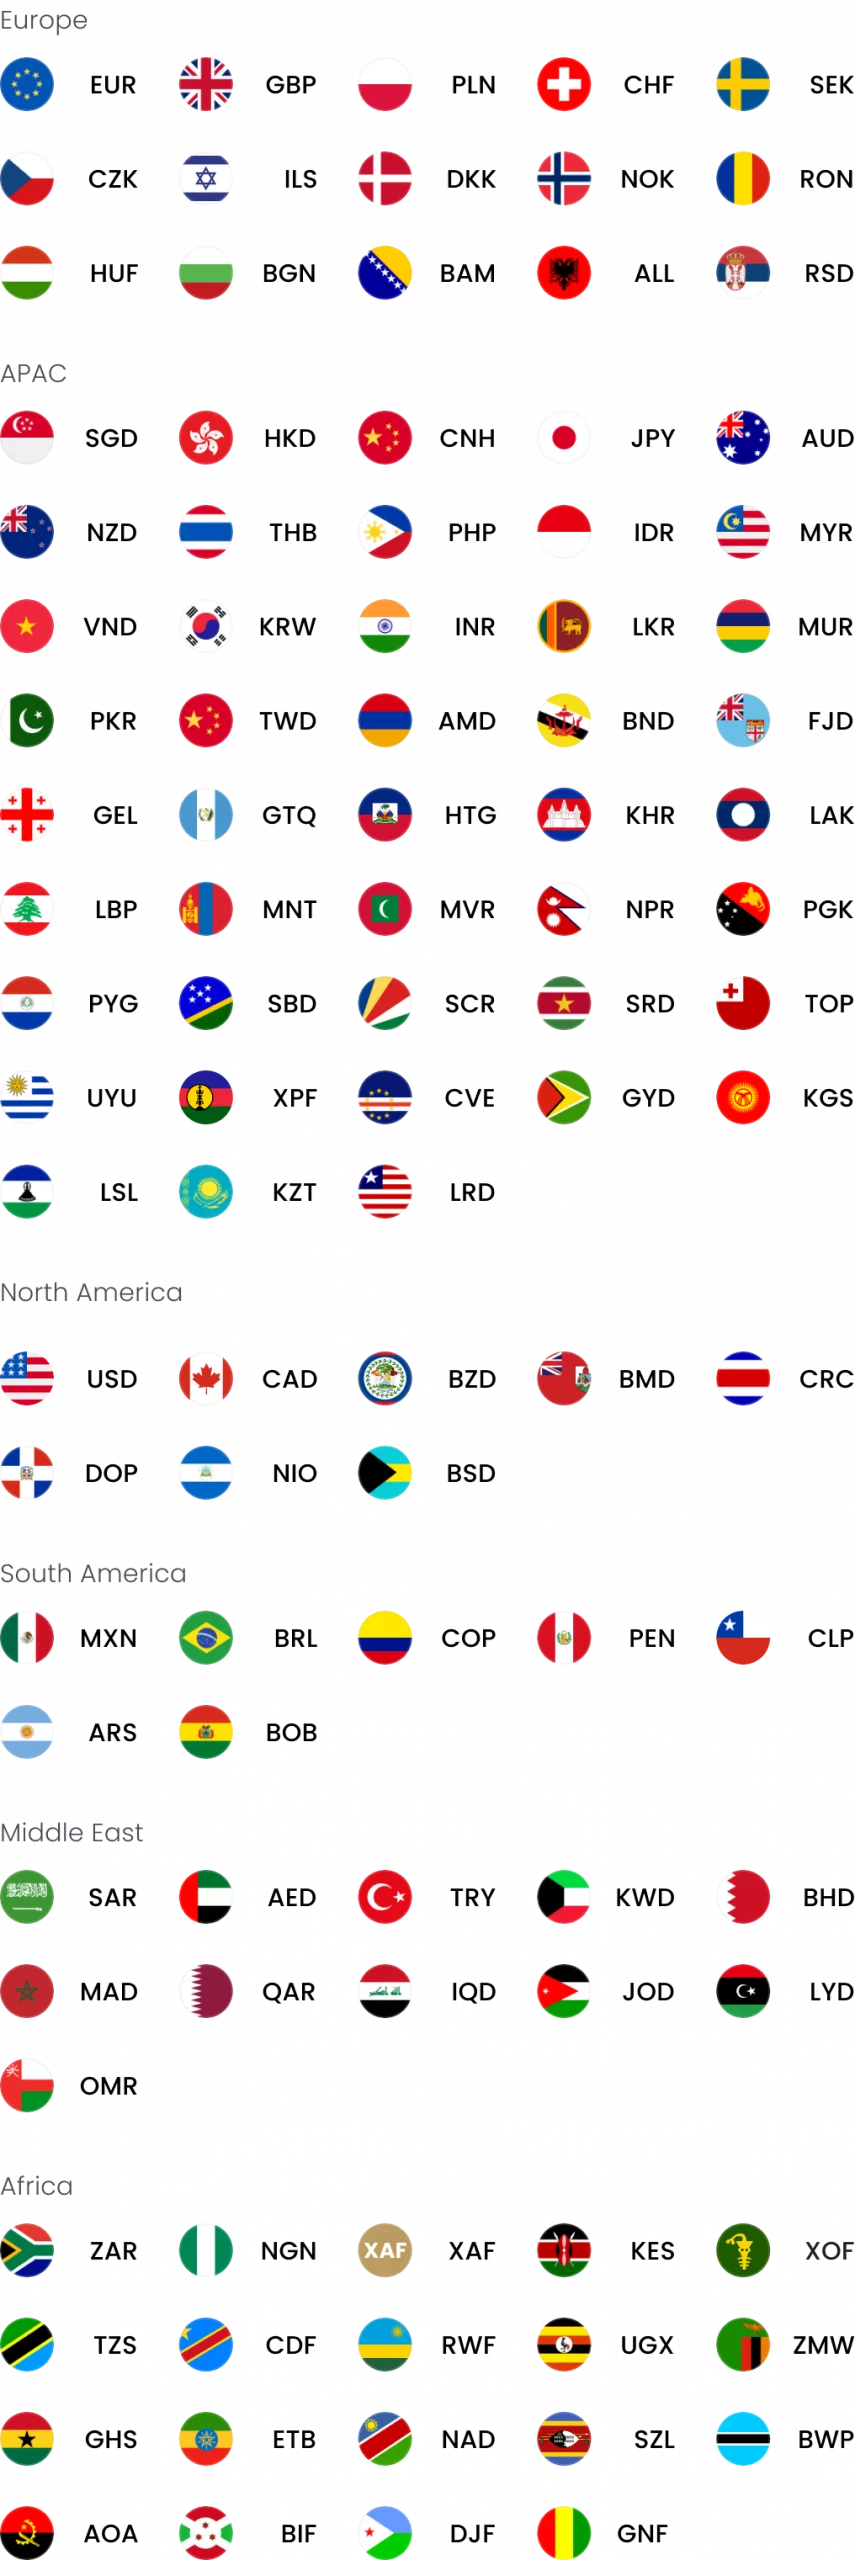
- Note: Each batch upload can include one receiving currency only. To add payees with different receiving currencies, upload a separate file for each currency.
Step 2: Provide your payment instructions
Once your payees have been added, choose how you want to make your mass payment, then enter the required details, including the amount, currency, payment date and fee option.
Important: Check your payment details
Before confirming a payment, check each payee’s bank account number and name. Payments are processed using the bank details you provide.
1. What are the types of mass payments available?
1.1. Portal payments
Best for a smaller number of payees. You can pay up to 25 payees directly through the WorldFirst portal, with the option to make the payment immediately or schedule it for a later date.
1.2. Scheduled payments via Excel
Designed for larger payment batches that need to be processed on a specific date. Upload your payment instructions using an Excel template for up to 200 payments per batch.
1.3. Instant payments via Excel
Designed for larger payment batches that need to be processed immediately. You can upload up to 2,000 payments in a single batch using the Excel template.
| Payment yype | How Payees Are Added | Payment Timing | Maximum Payments per Batch |
| Portal payments | Direct to portal | Instant or scheduled payment | 25 |
| Scheduled payments | Uploaded via Excel | Scheduled on a specific date | 200 |
| Instant payments | Uploaded via Excel | Instant | 2,000 |
Choose the payment method that best suits the number of payments you need to make and when you want them to be processed.
2. How do I add multiple payees into the Portal?
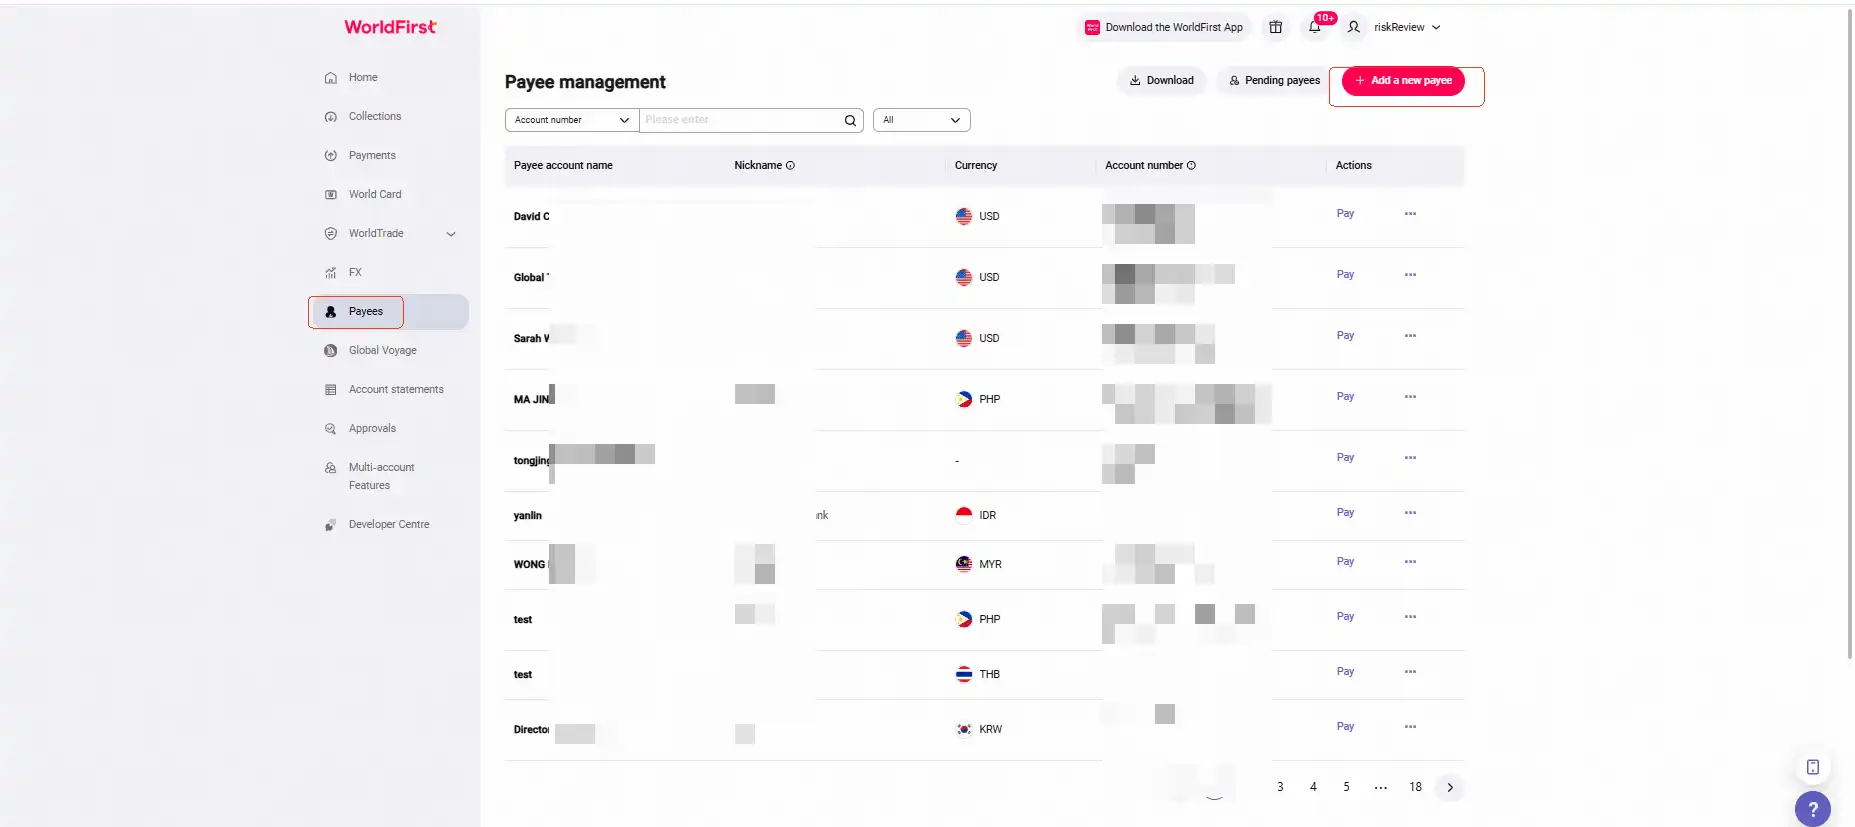
- From your WorldFirst dashboard, go to Payees > Add a new payee
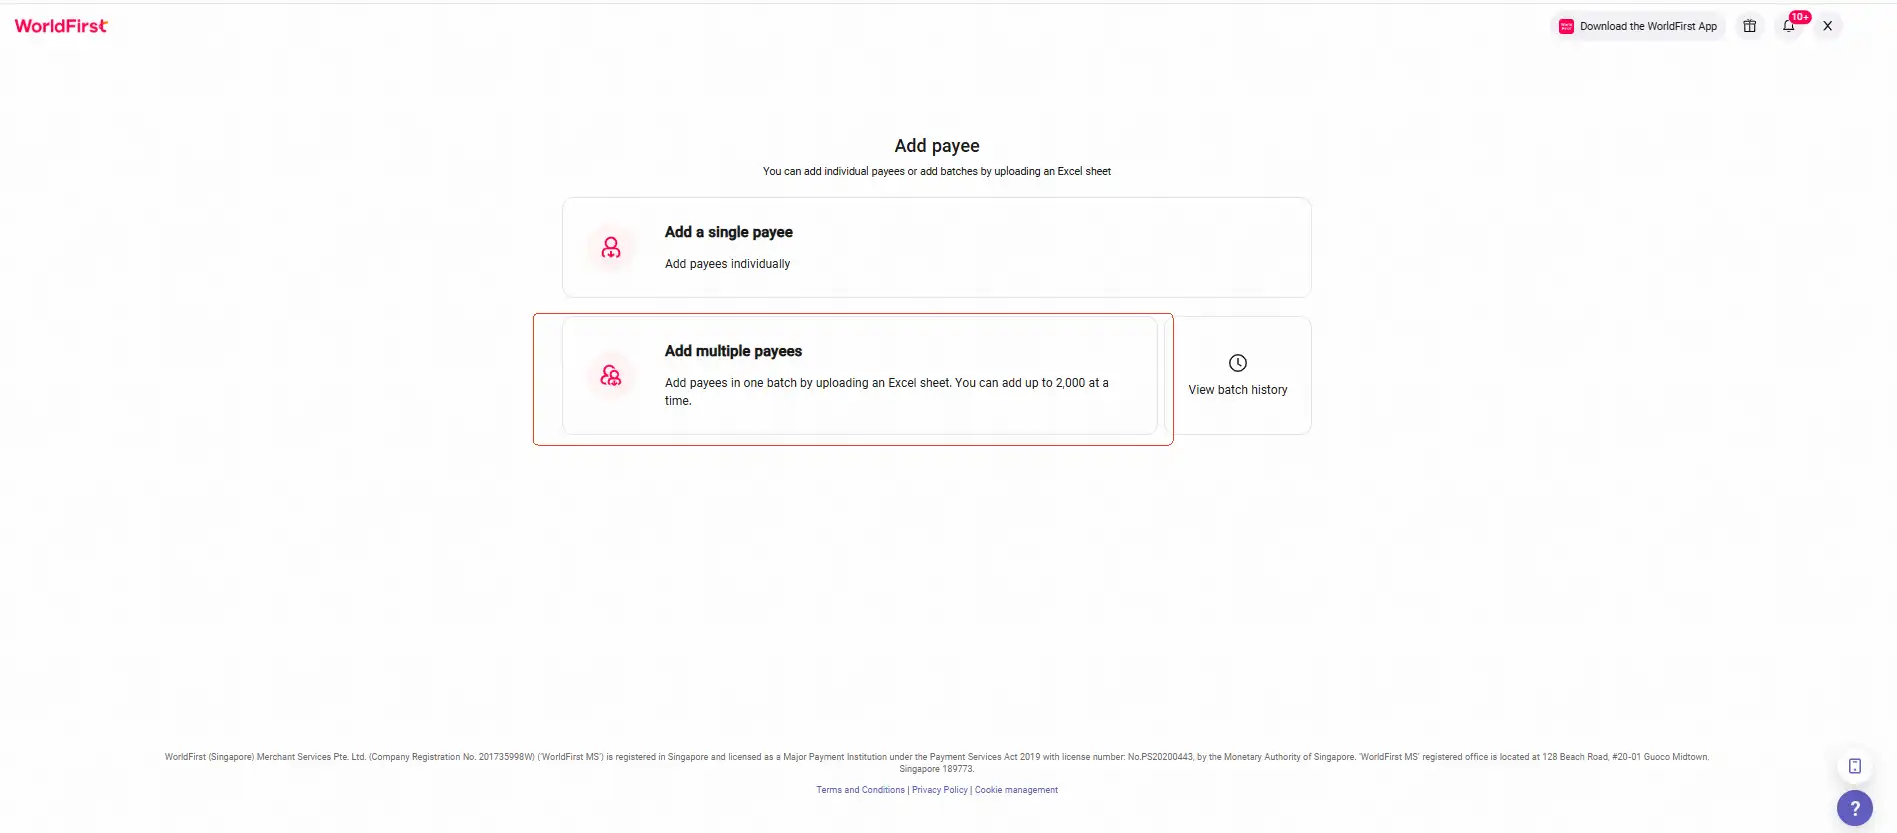
- Select Add multiple payees
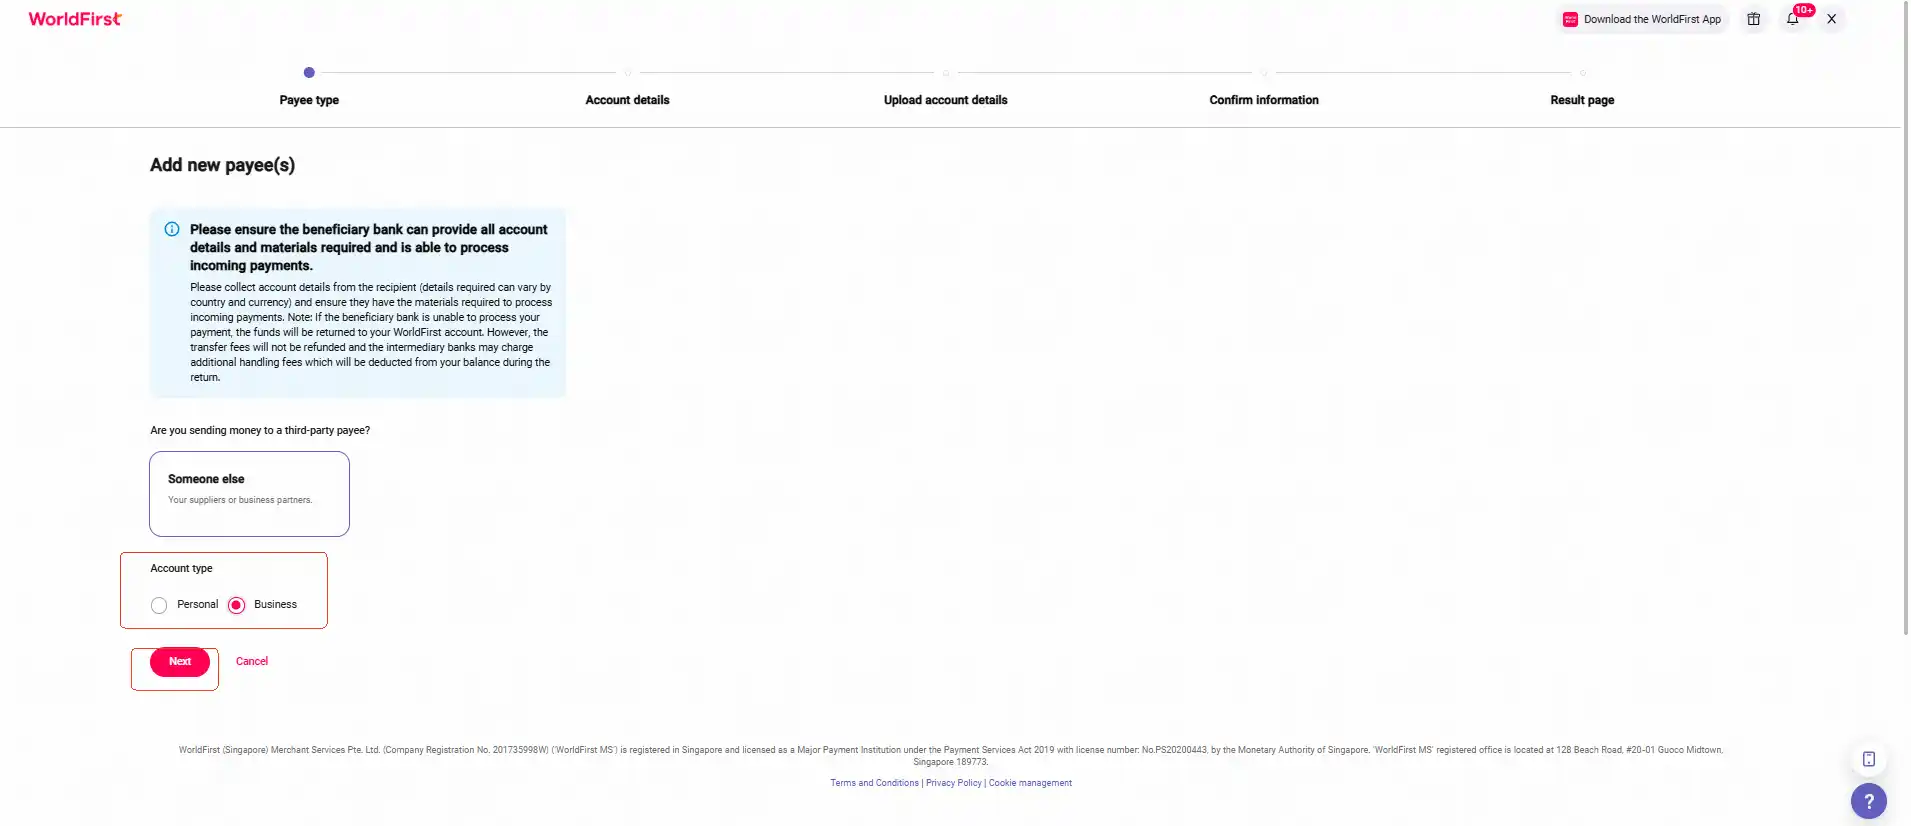
- Select the relevant Account type
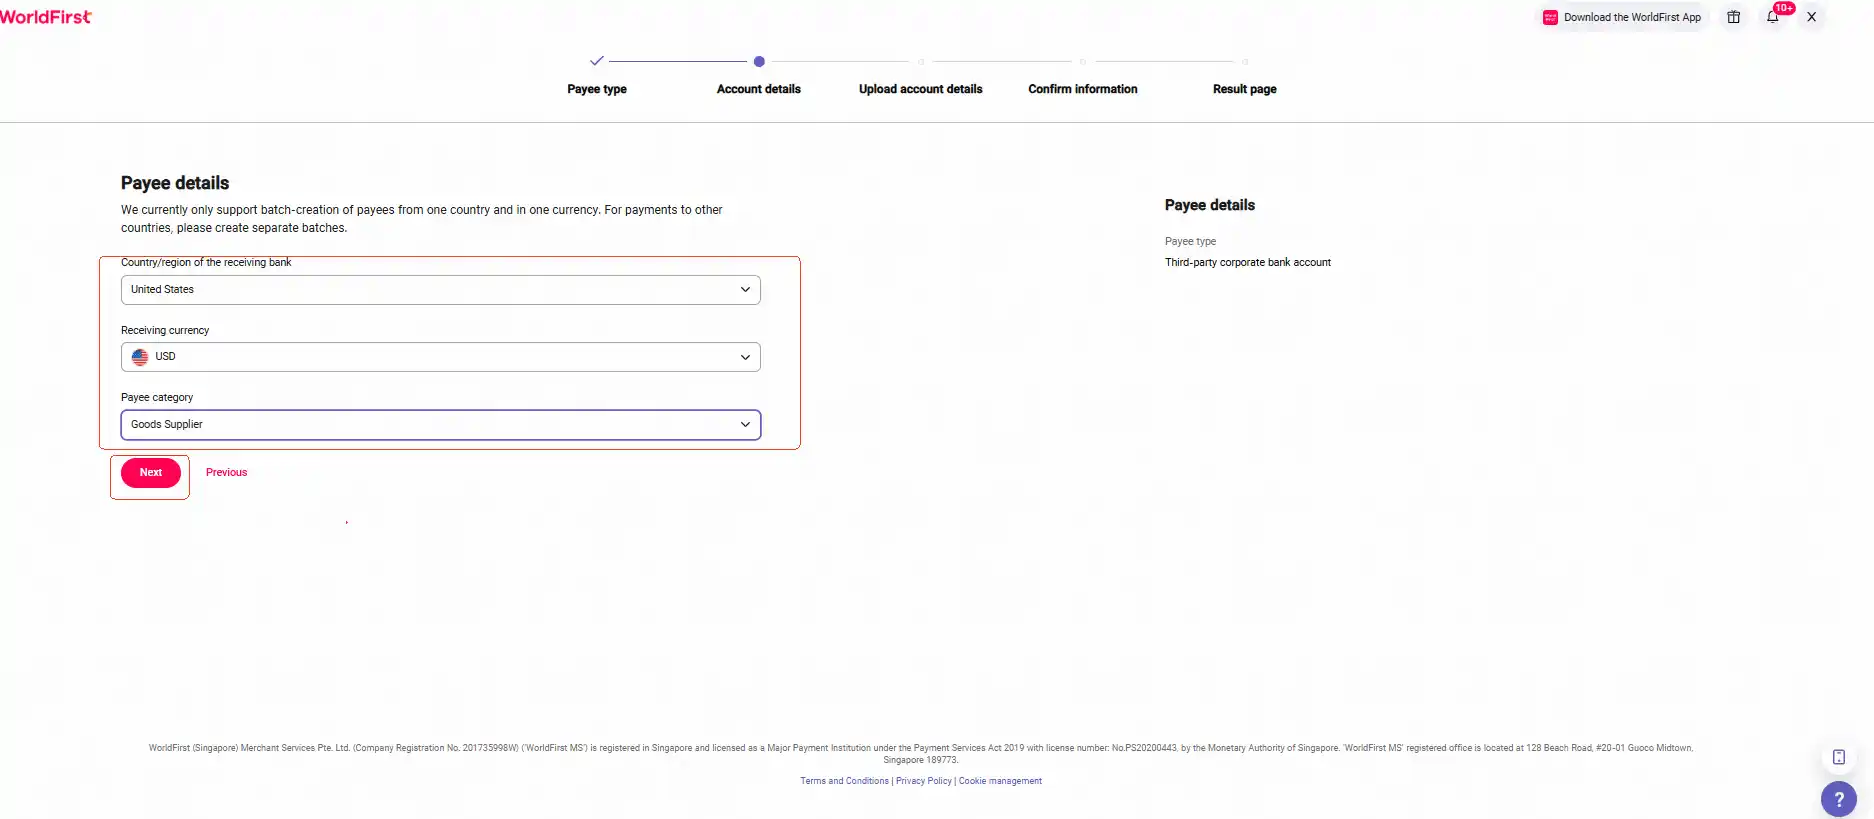
Select the following:
- Country/region of the receiving bank
- Receiving currency
- Payee category
- Download the template
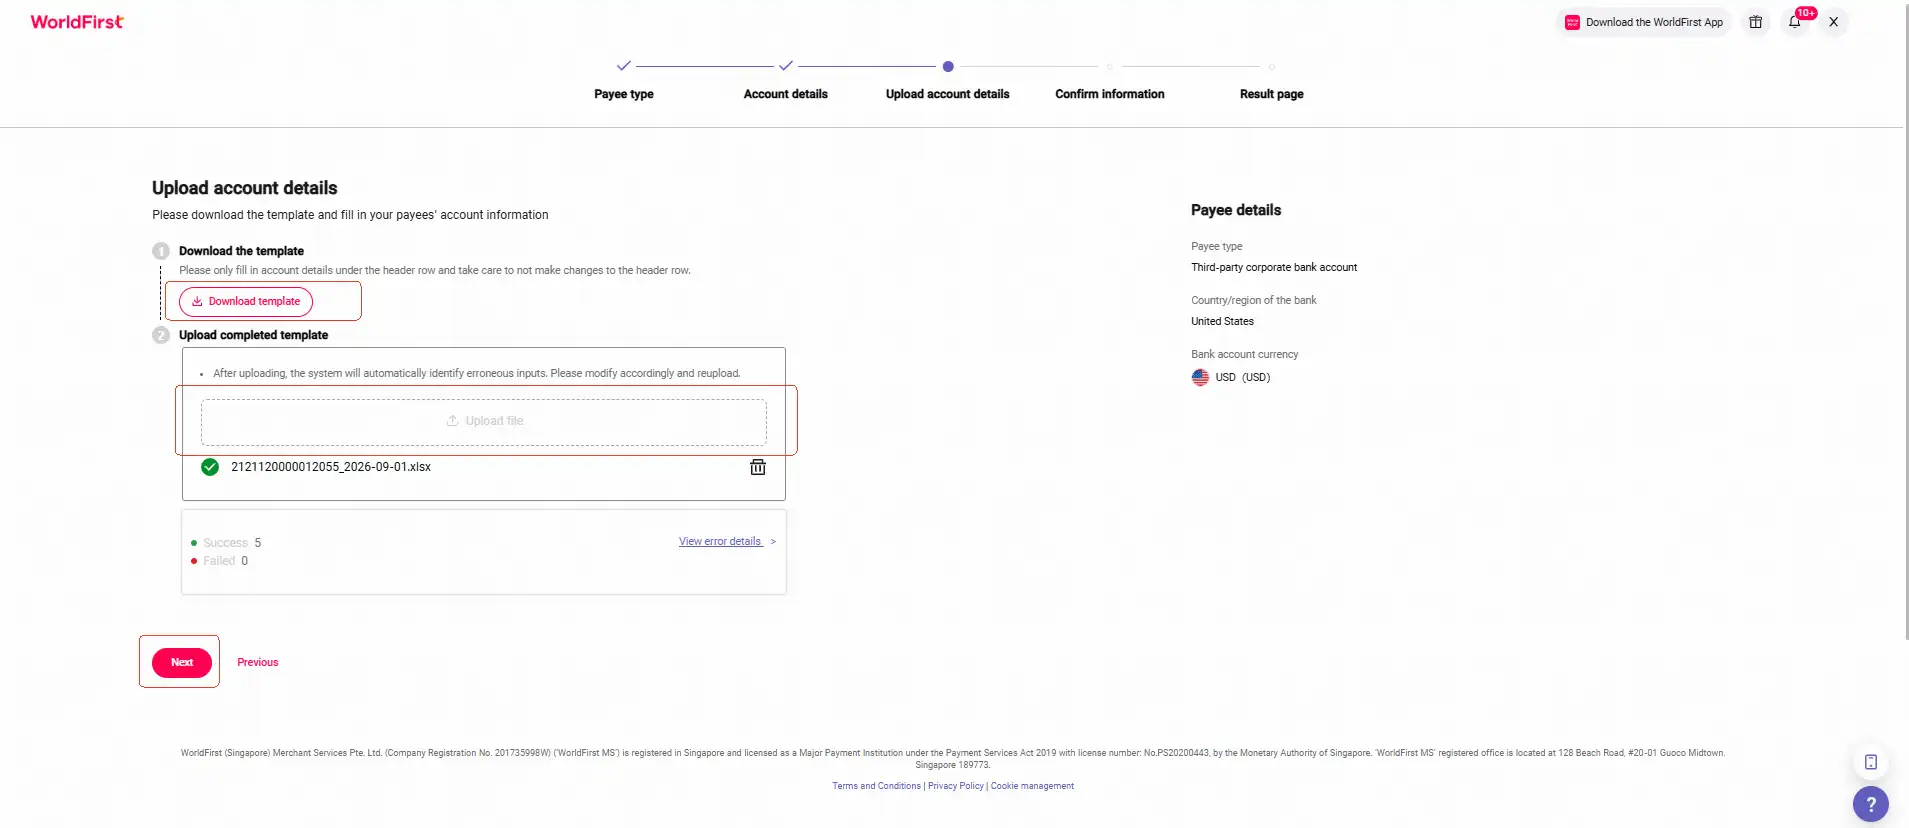
- Enter the required payee information
- Payee’s name
- Default payment reference (optional)
- SWIFT/BIC
- Payee account number
- Payee address (optional)
- Nickname
- Payee email (optional)
- Upload the completed file
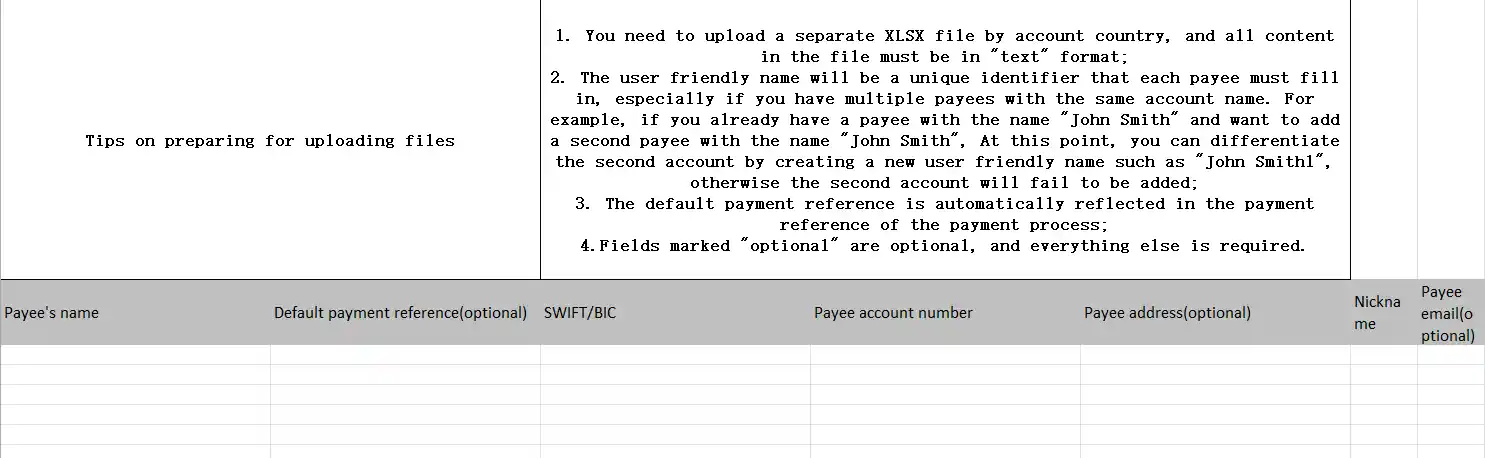
*Note: If your upload fails, check the error message, correct the information in your Excel file and upload it again.
- Review the payee information carefully. If everything is correct, select Add payee to submit for verification.
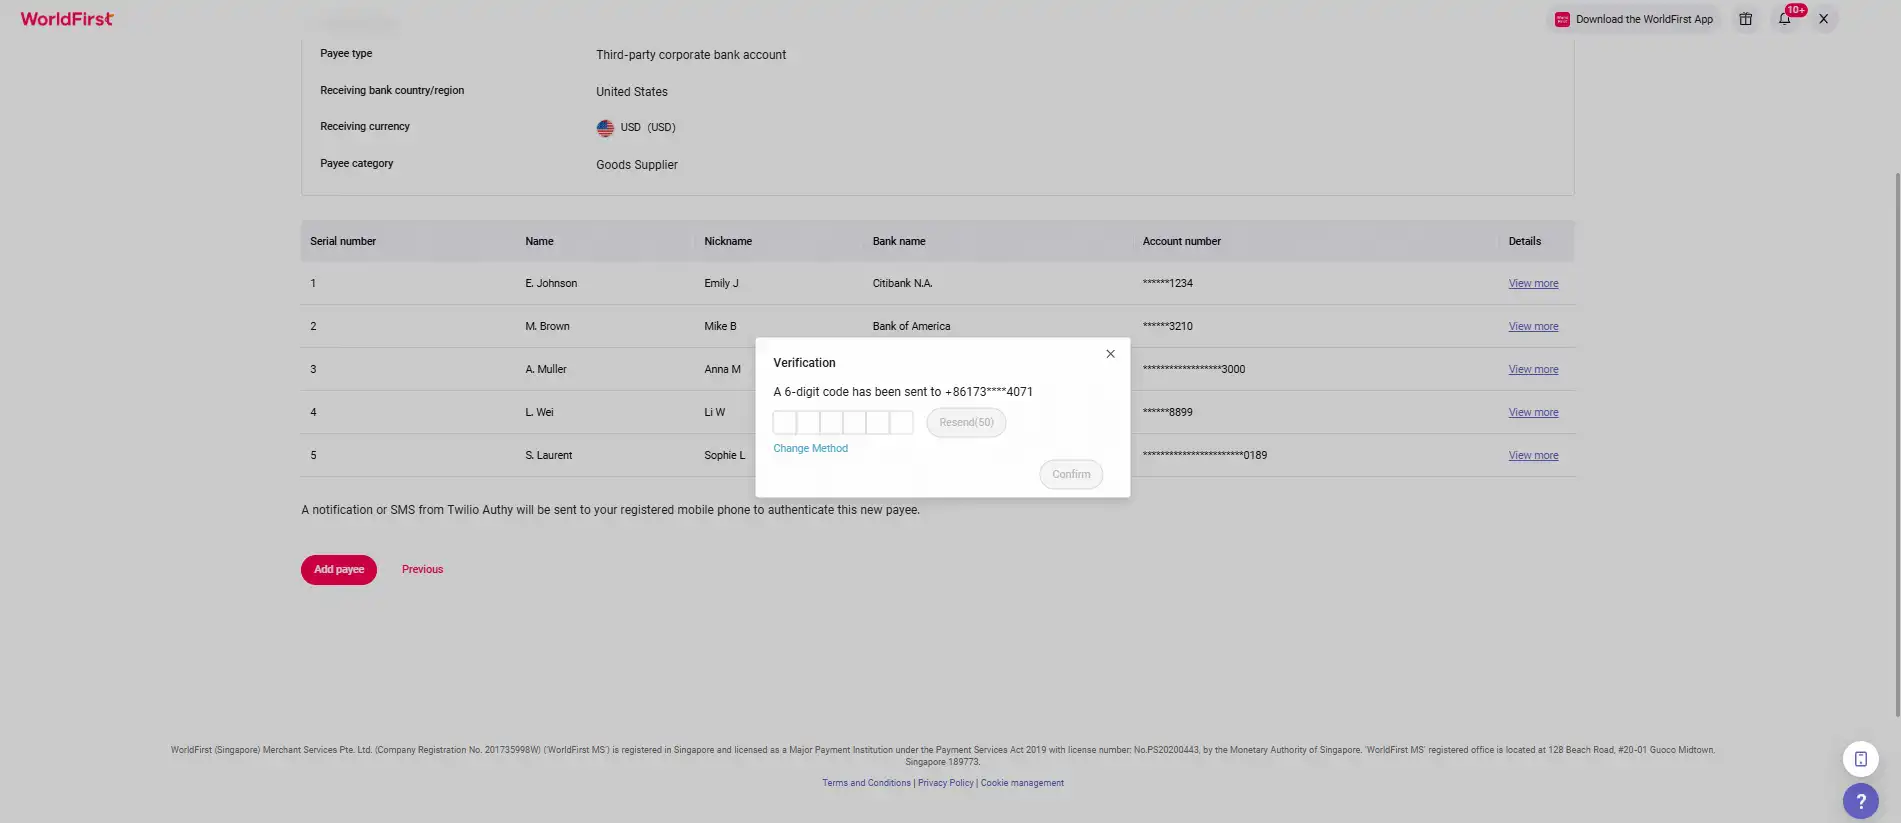
- Your payees will be processed after submission; verification may take a few minutes
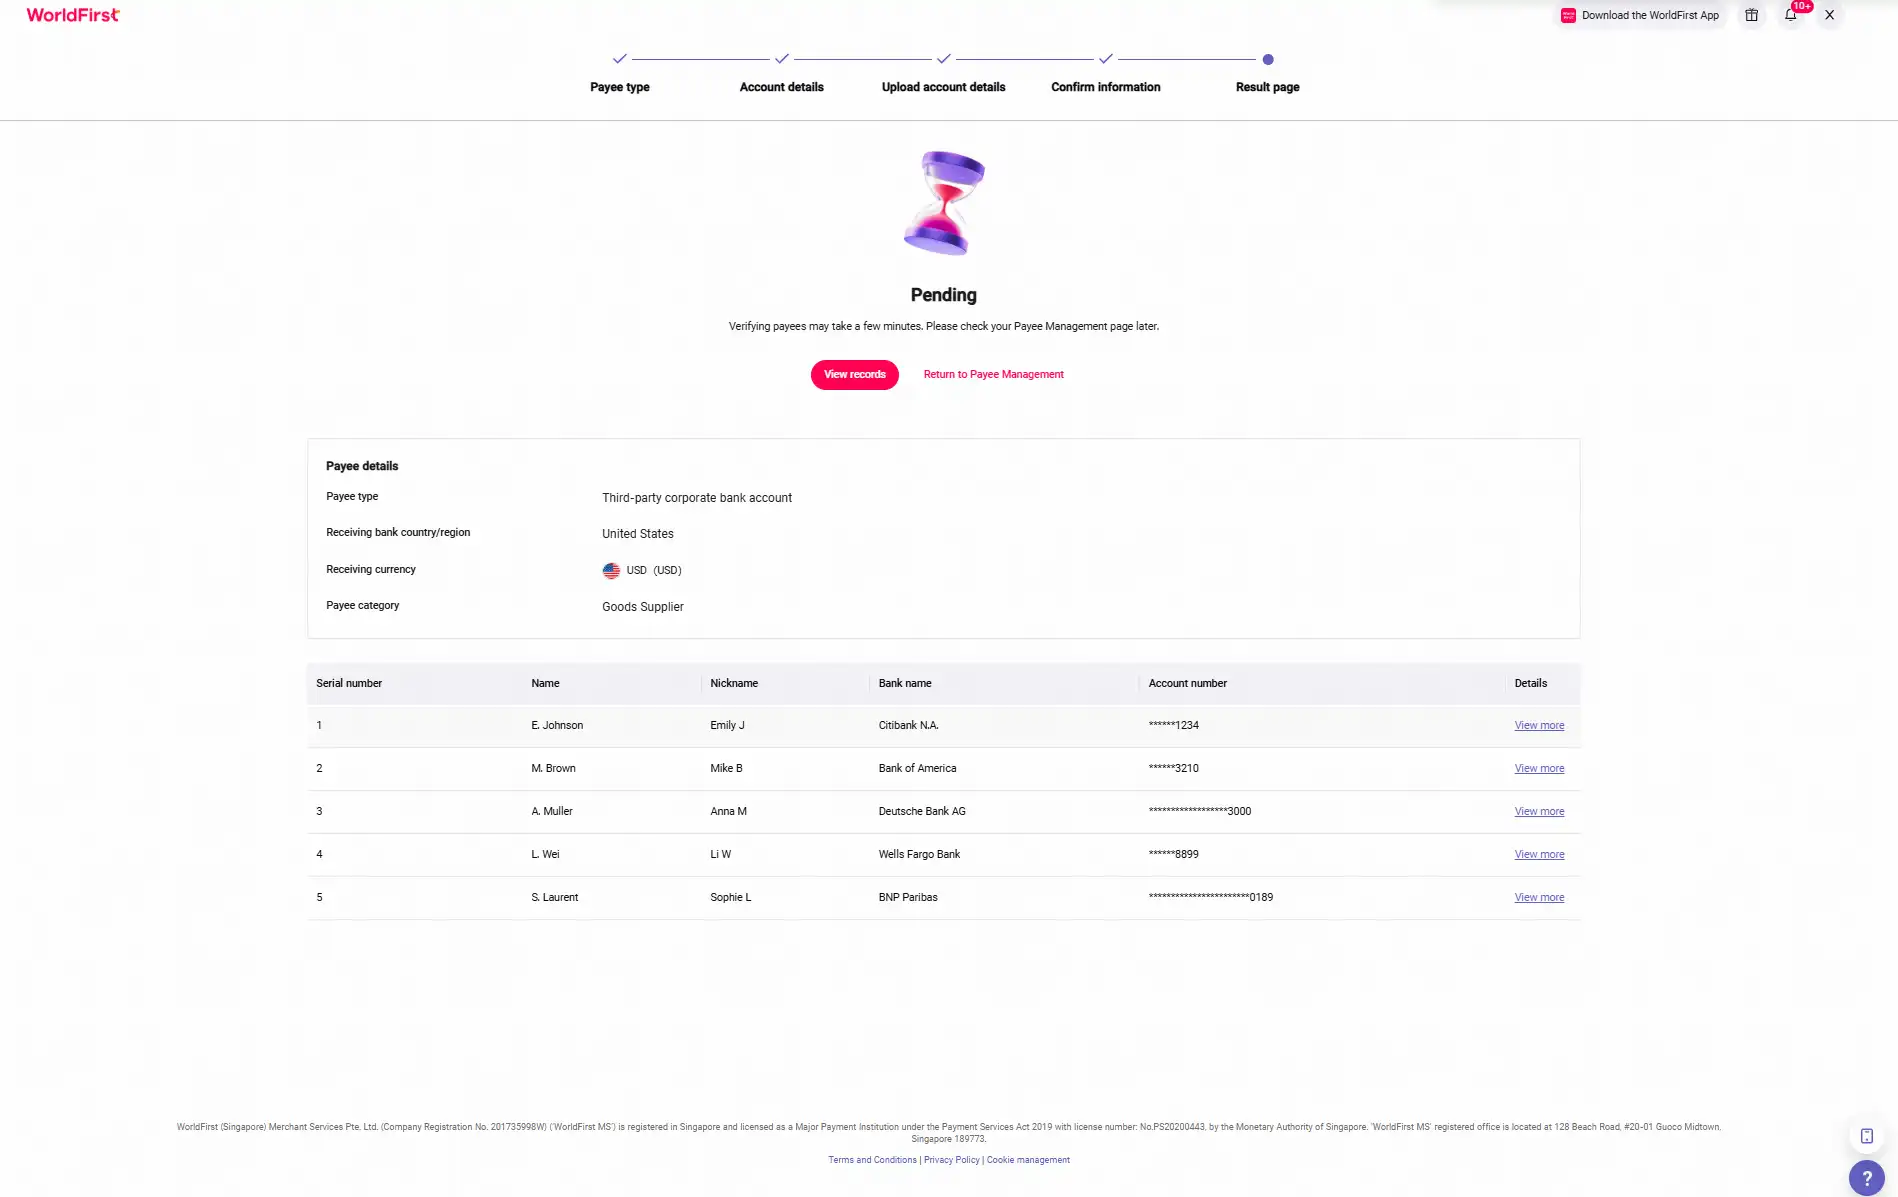
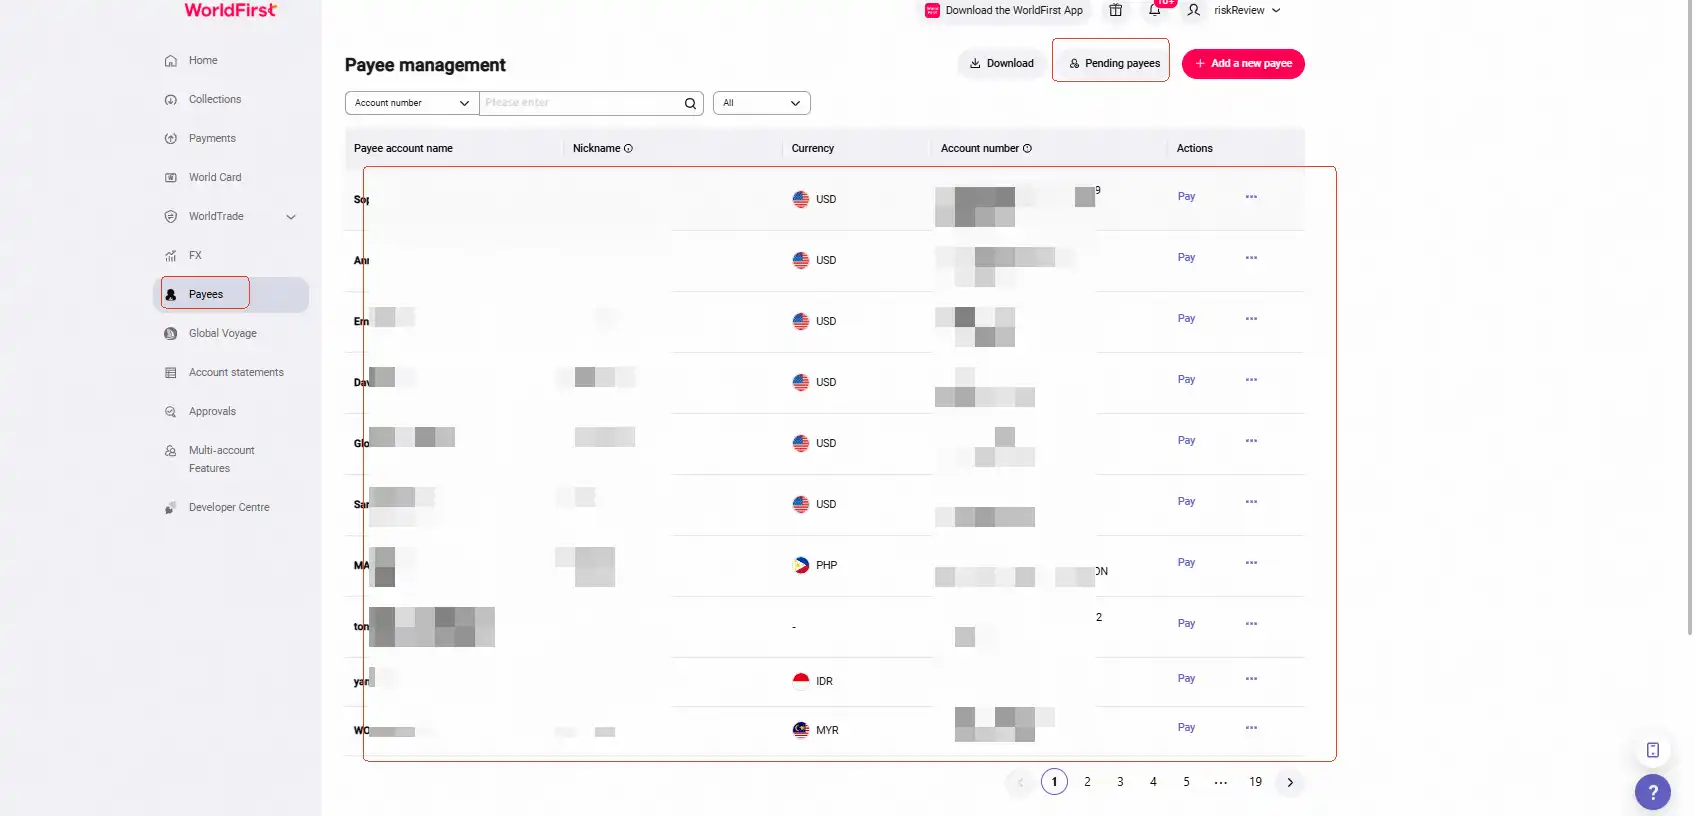
Once processing is complete, return to Payees on your WorldFirst homepage to check the results.
- Successfully added payees will appear on the Payee management page
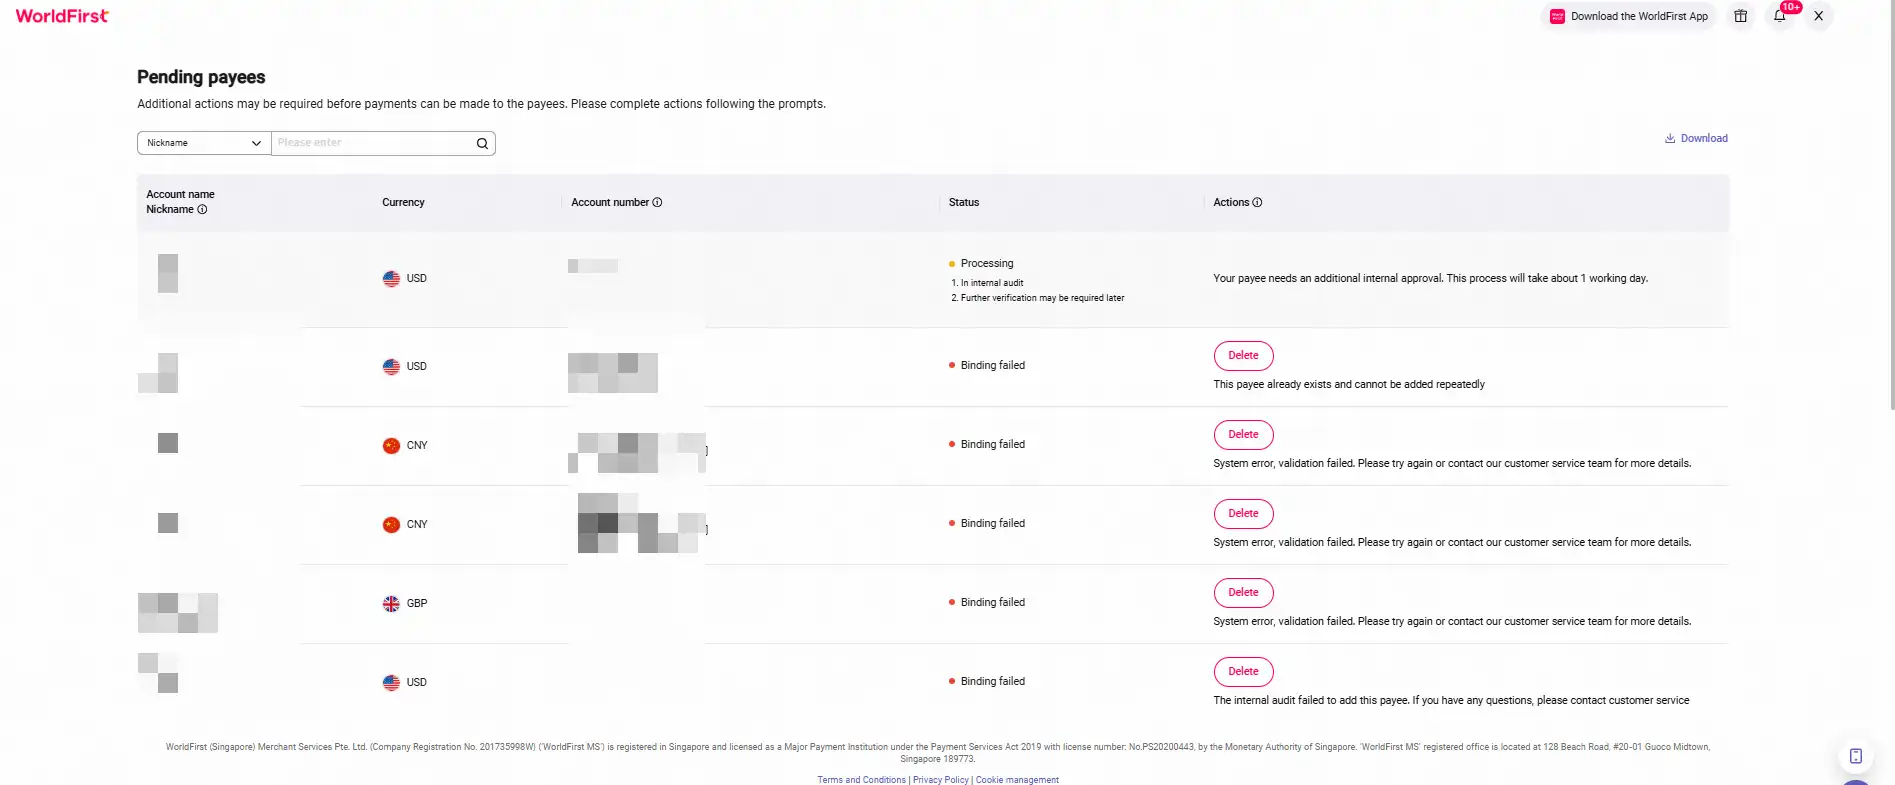
- Select Pending payees to check payees still being processed or to find out why a payee couldn’t be added
3. What if there are errors in the submitted information?
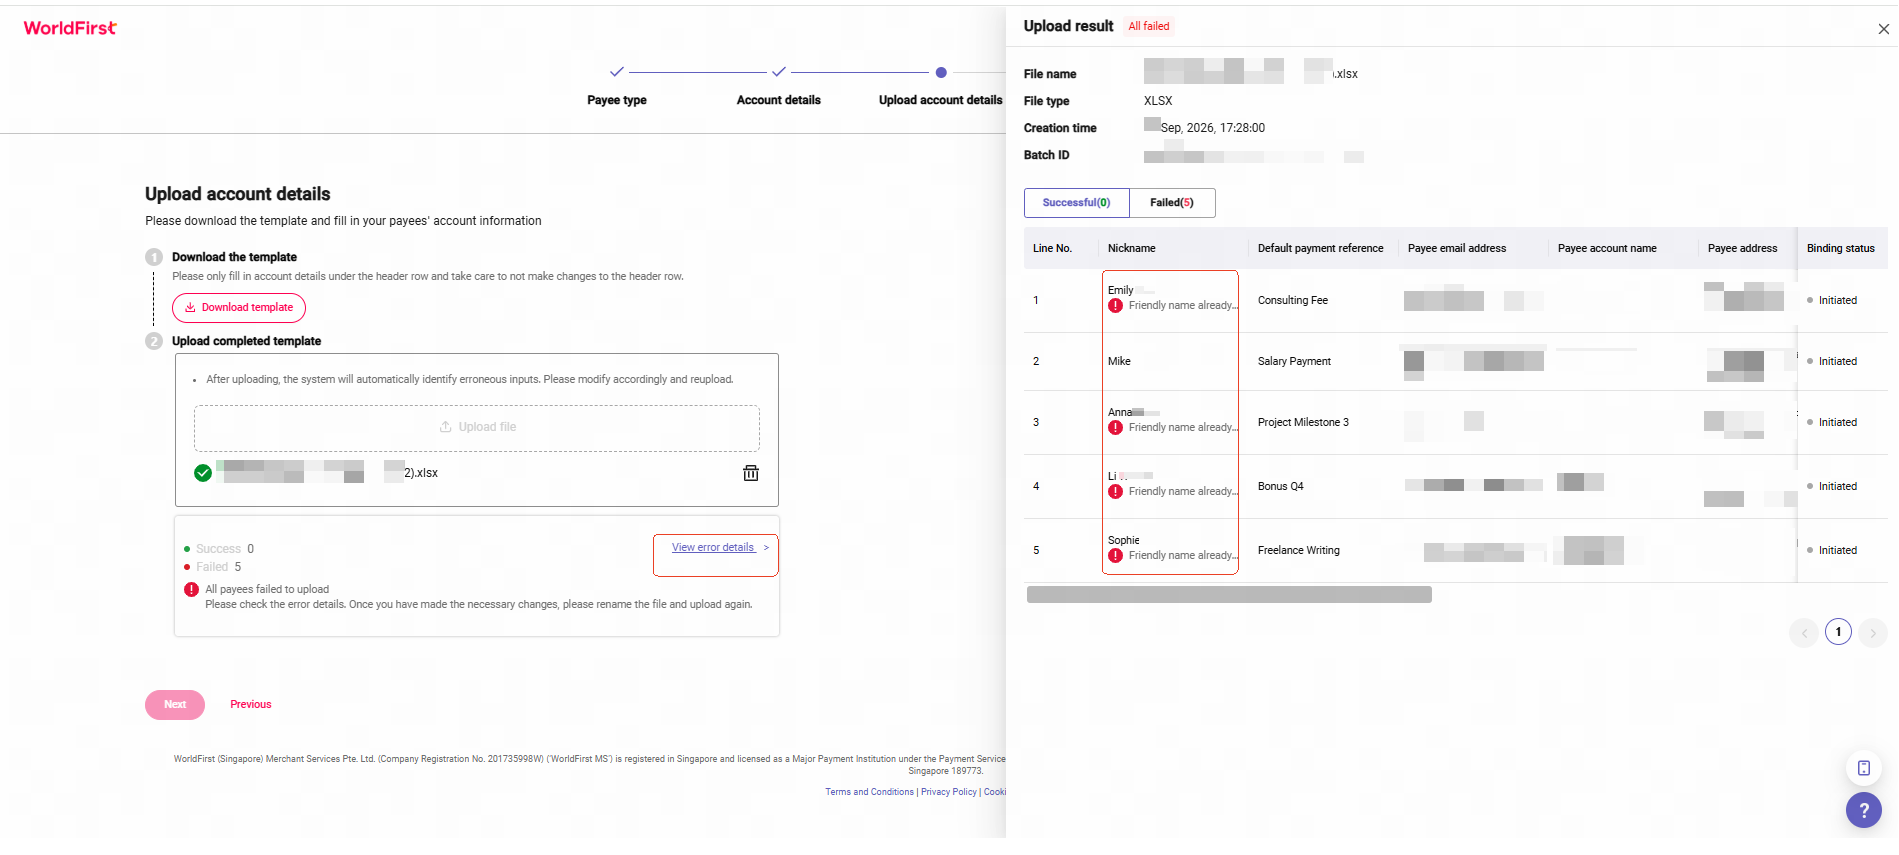
- The upload result will display an error message if it detects:
- Duplicate nicknames
- Duplicate bank account numbers
- Invalid SWIFT codes
- To resolve an error:
- Select View error details to identify which payee information requires attention
- The system will display the relevant error description
- After correcting the information in your Excel File, you can resubmit your payment batch
4. How do I make mass payments directly from the portal?
- You can make payments to up to 25 payees directly through the WorldFirst portal.
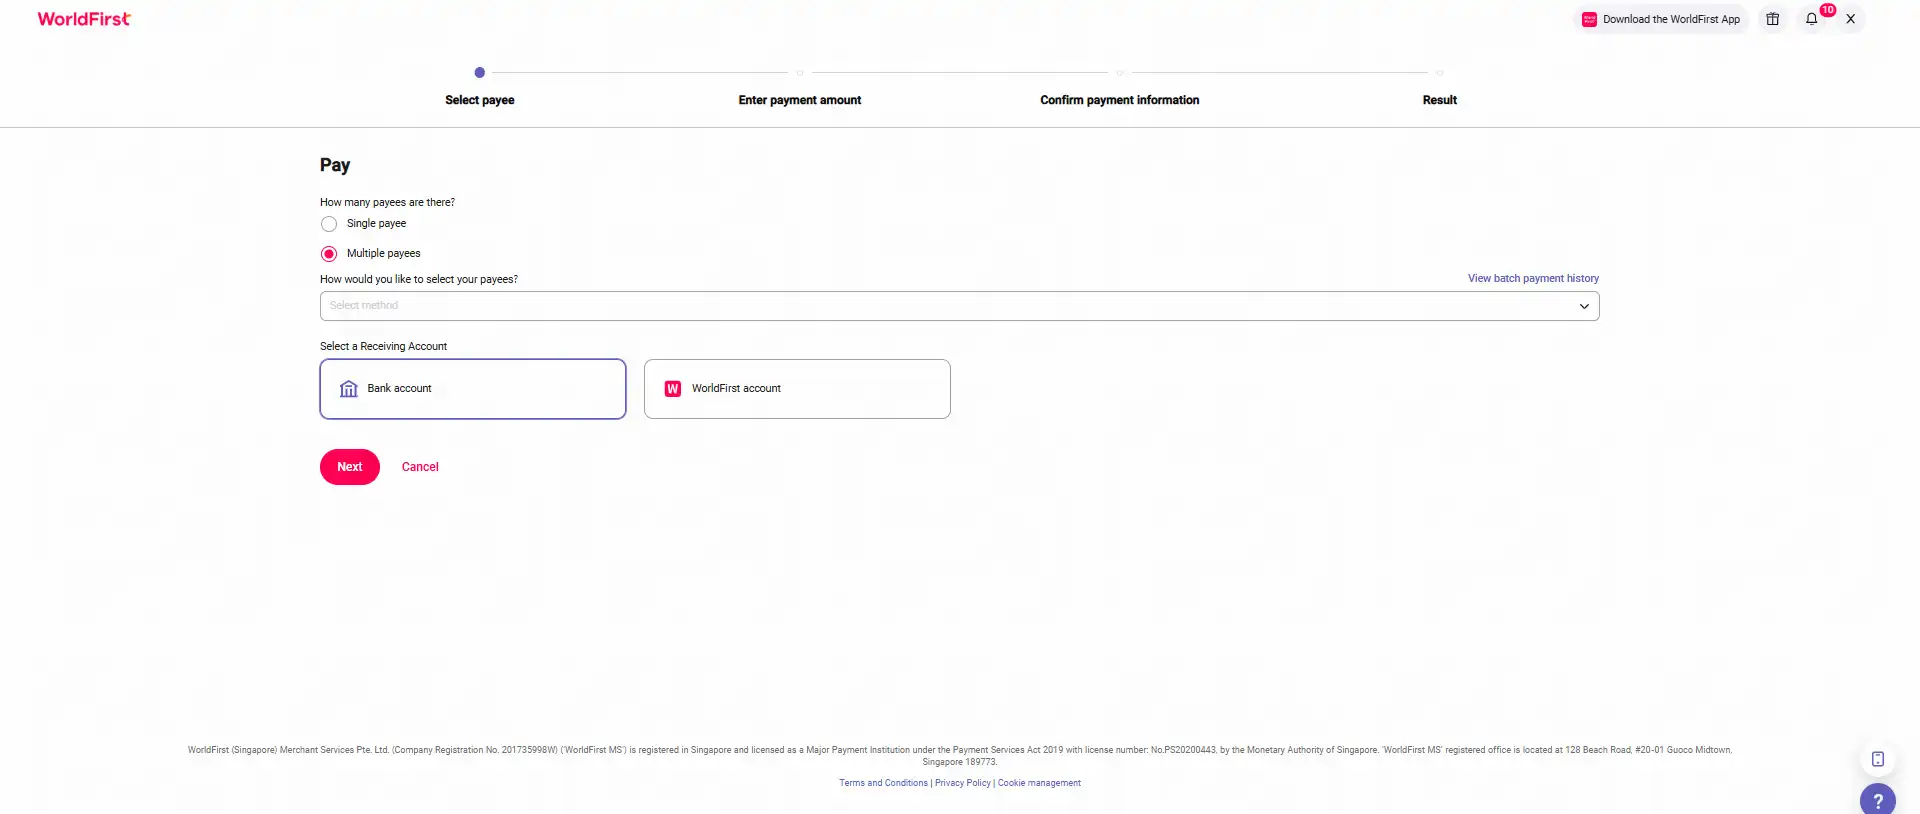
- Under Select Payee, choose Multiple Payees.
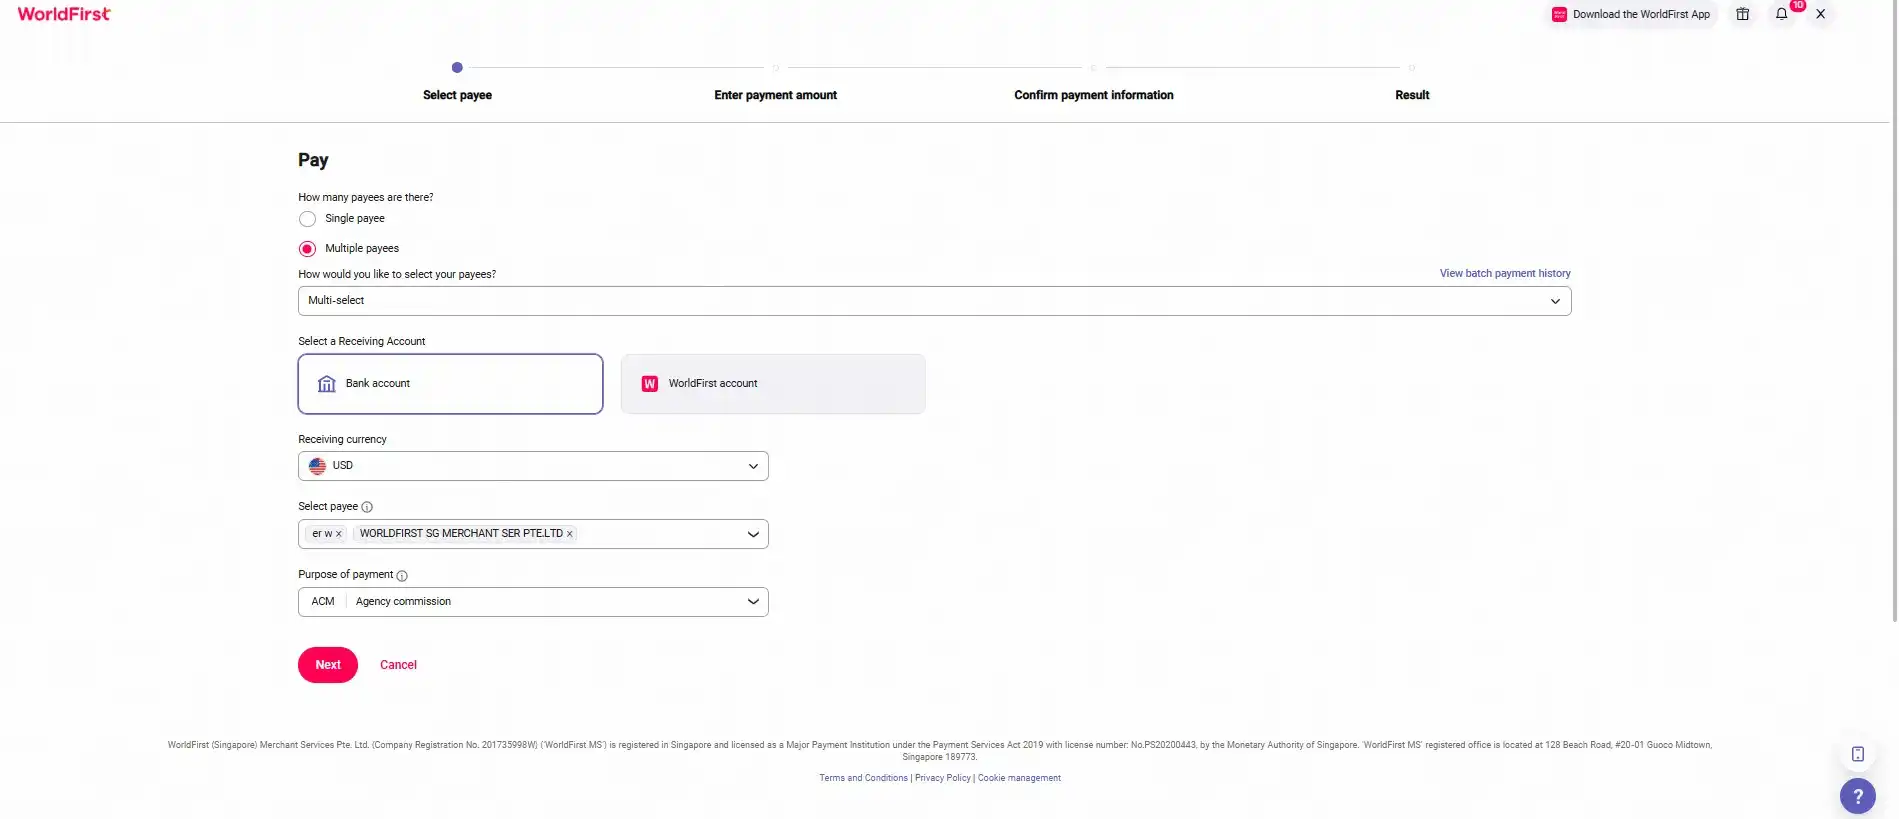
- Select the payee’s receiving currency. Add up to 25 payees under Select Payee
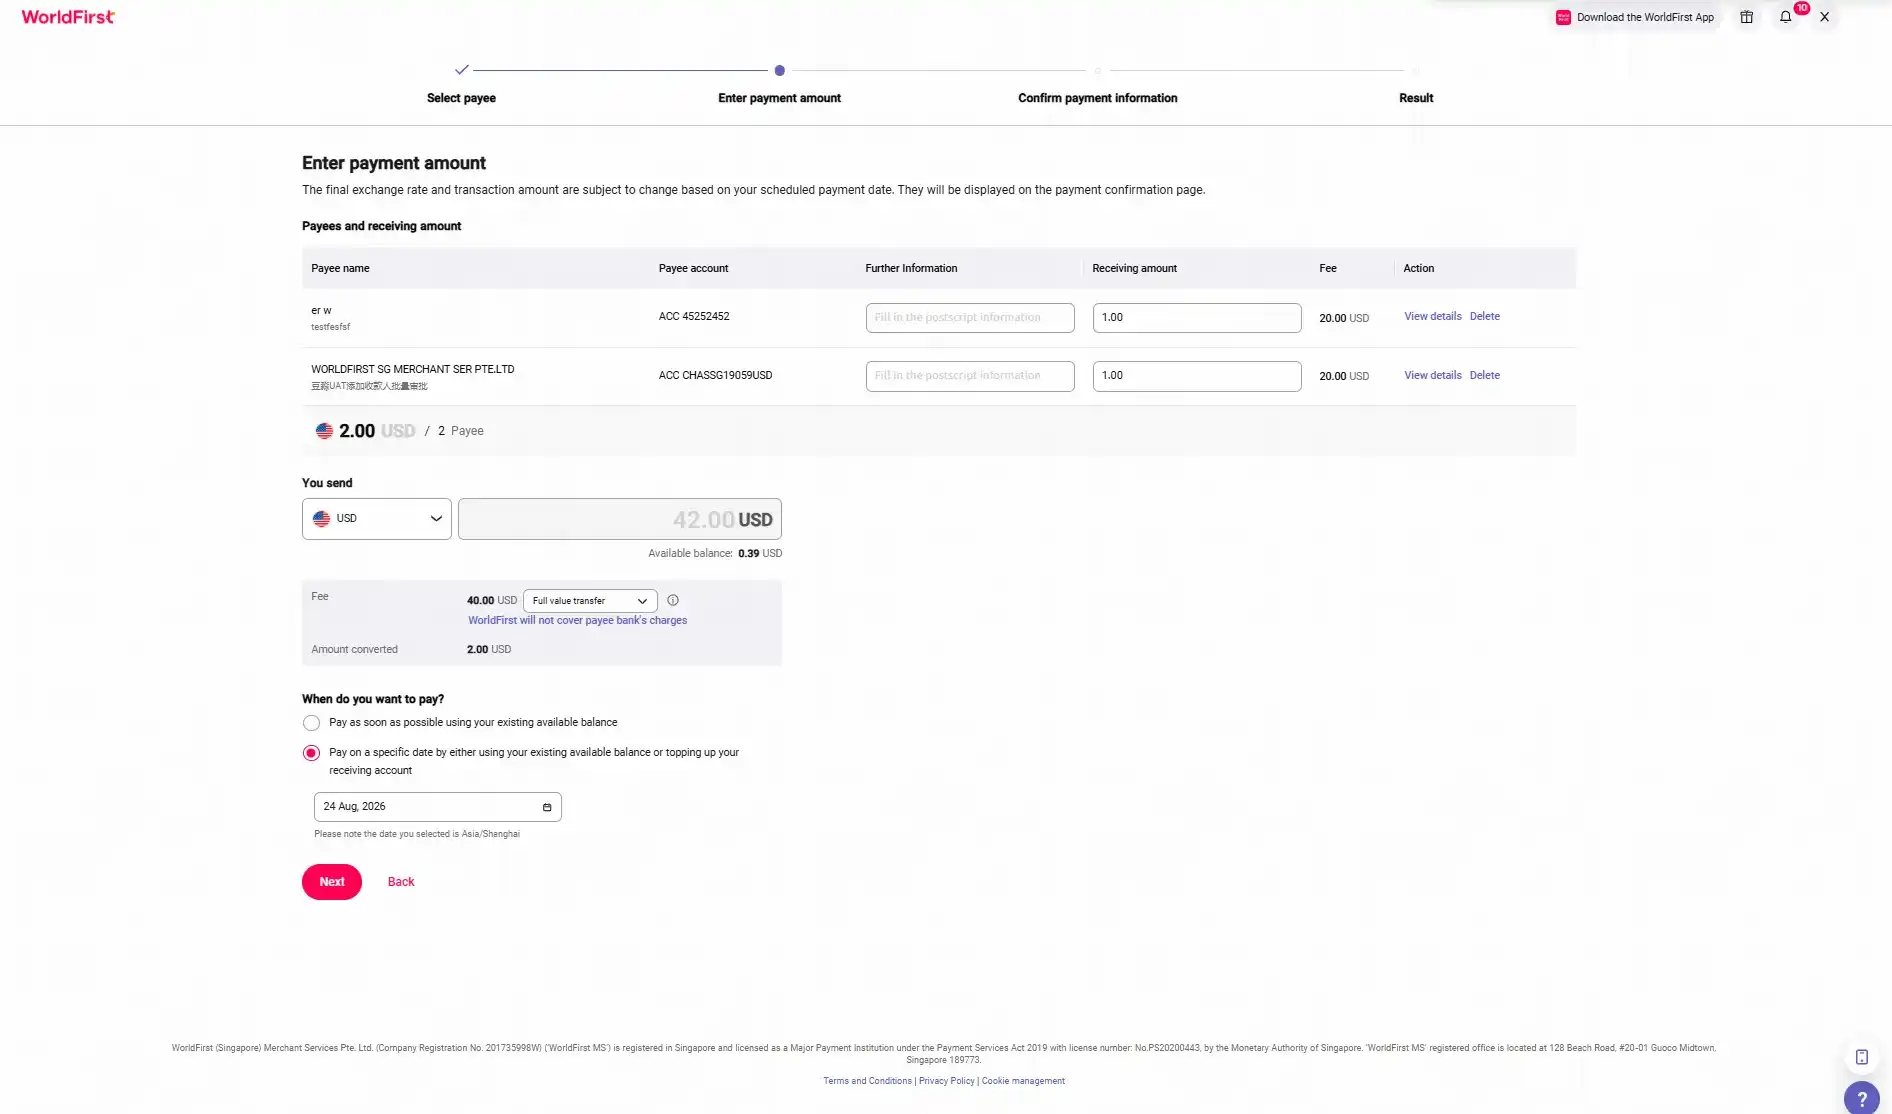
- Enter your payment details
- For each payee
- Enter the receiving amount and currency
- Select your preferred fee deduction method: Full value transfer or standard transfer
- Select the payment date: Instant or scheduled payment
- Note: For forward payments, you’ll need to pay the required initial deposit
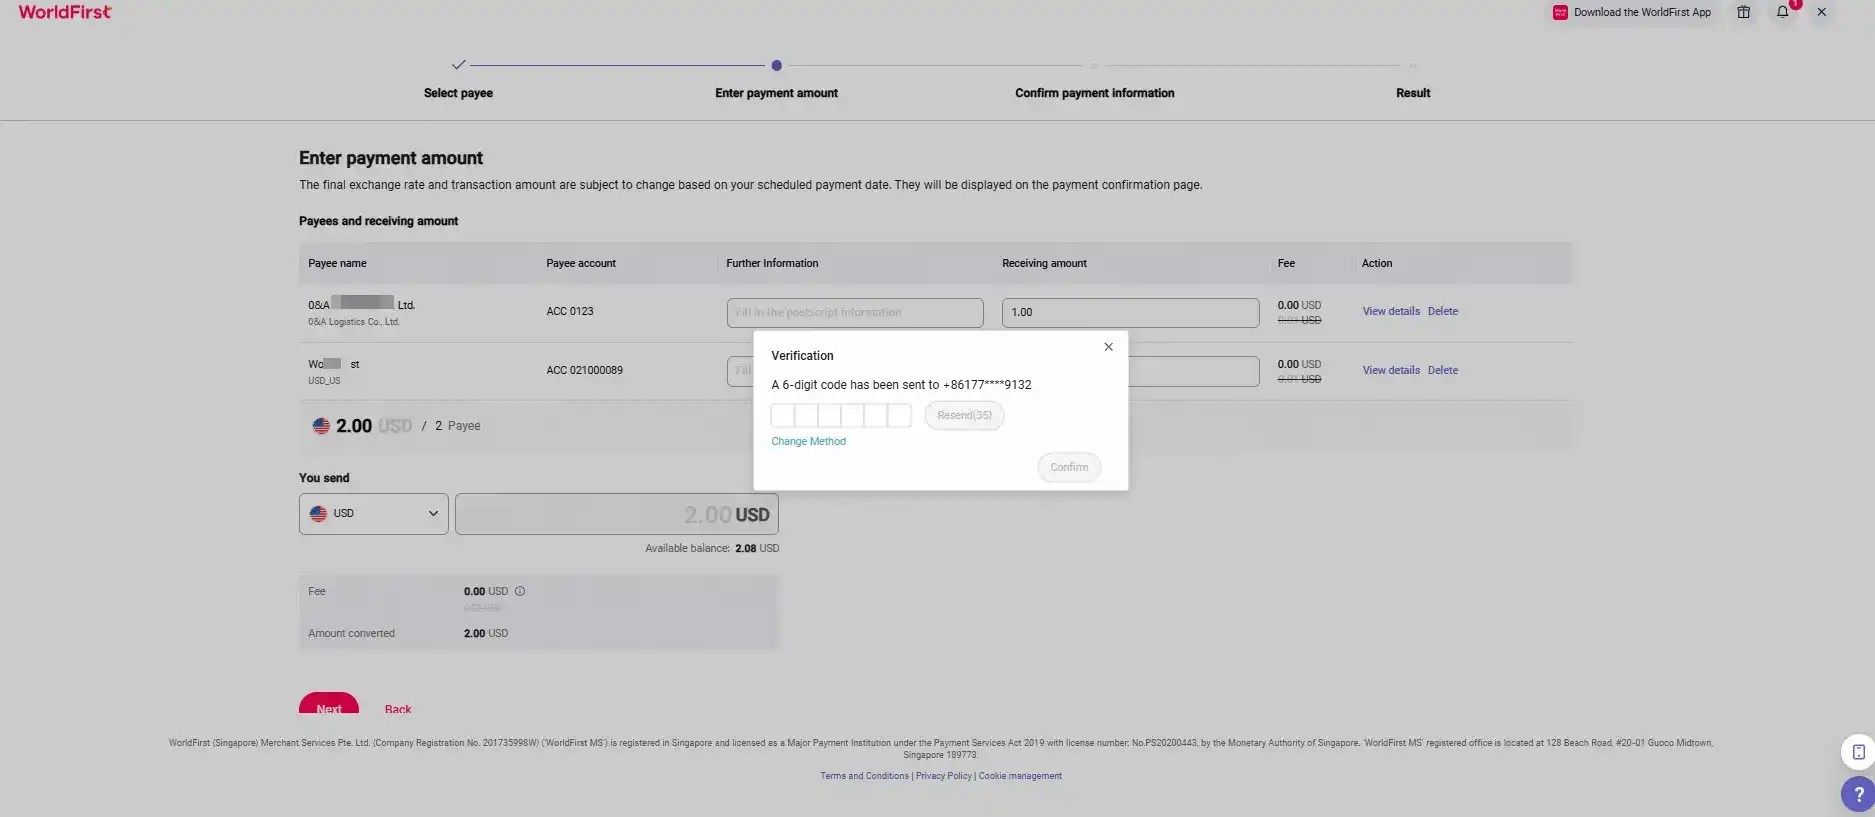
- Complete verification
- Review and complete the required verification process
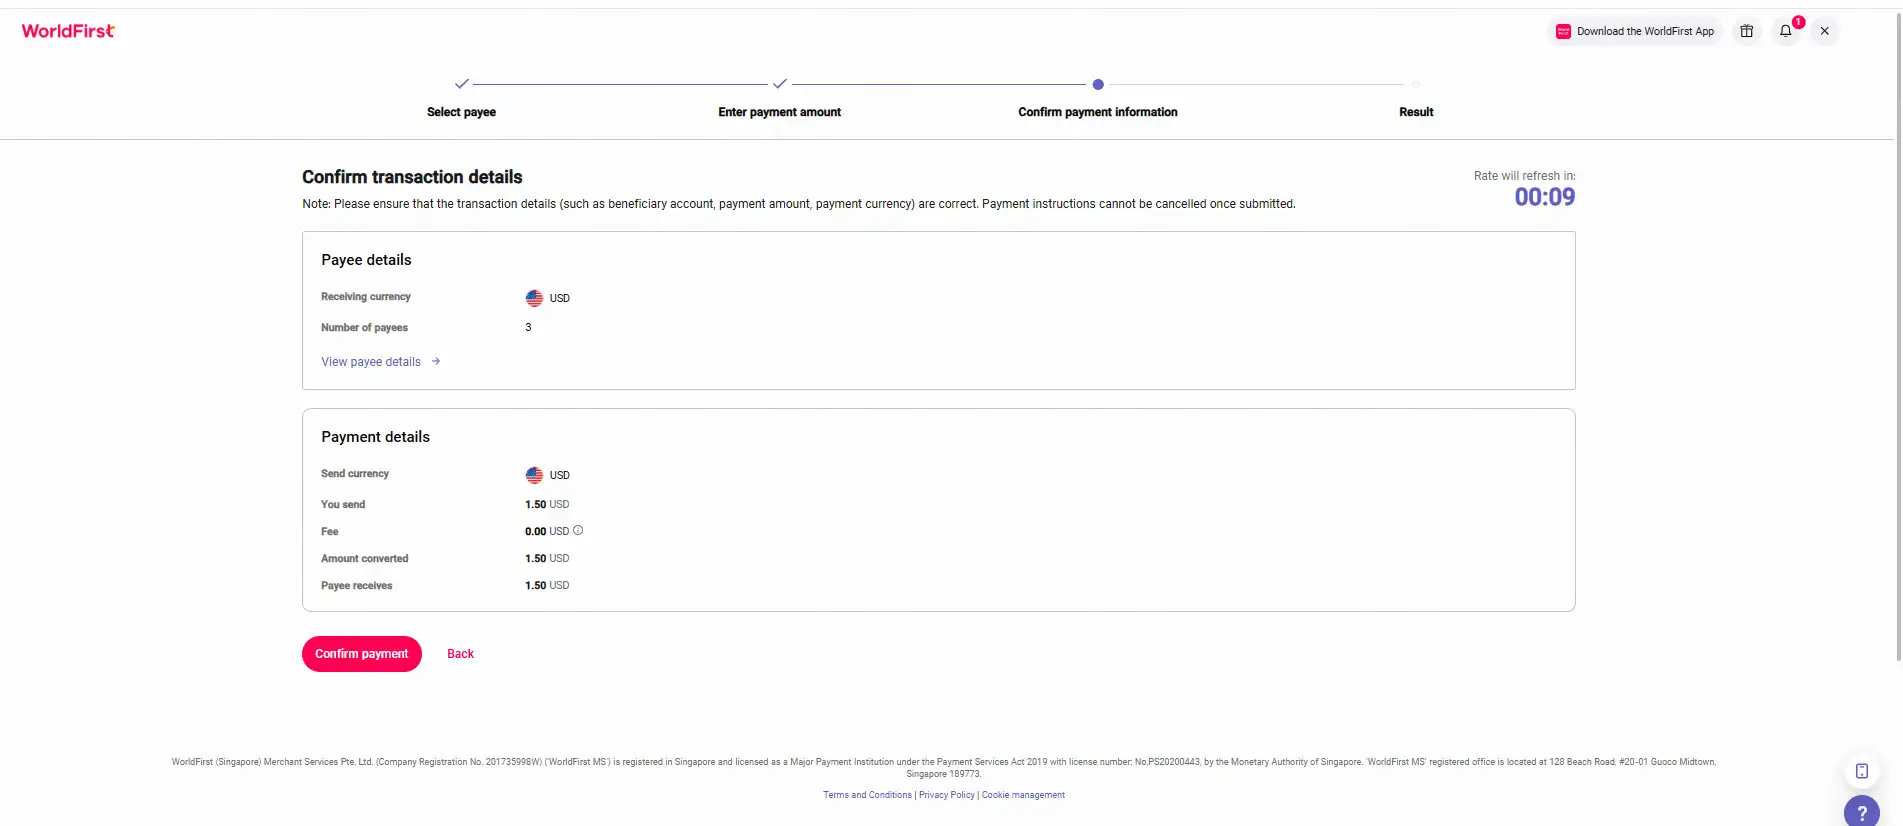
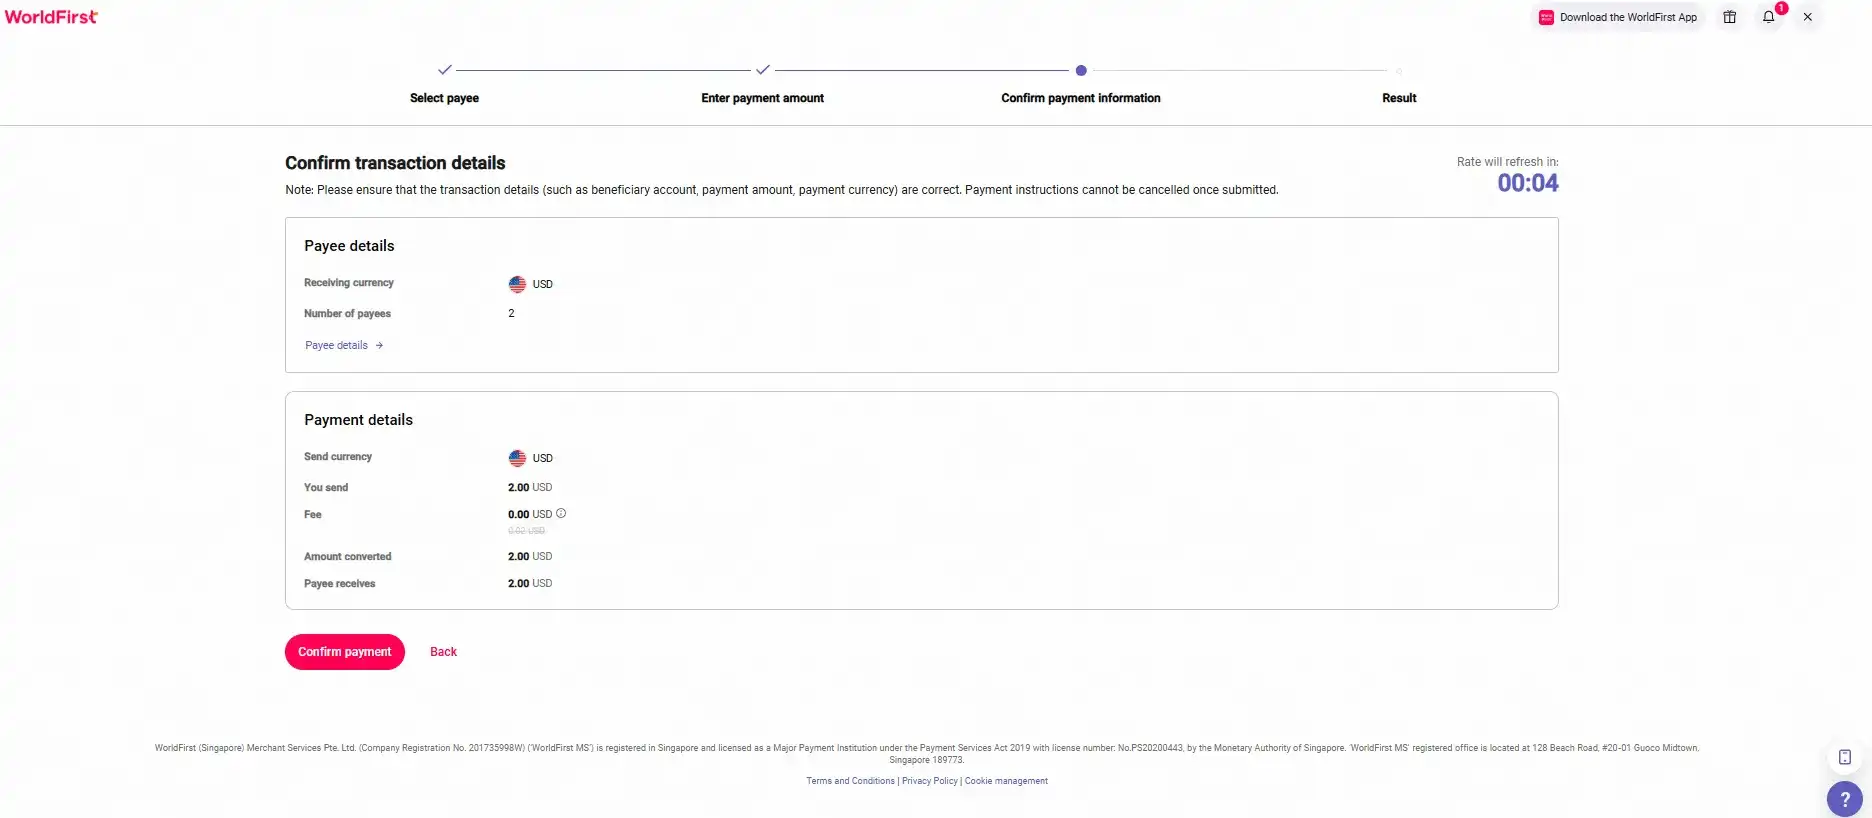
- Confirm your transaction
- Review all transaction details carefully before confirming your payment
- Once your payment has been confirmed, you’ll be able to view the payment result
5. How do I make mass payments by uploading an Excel?
There are two Excel upload options available, depending on the number of payments you need to make and whether you want to schedule your payments.
- Import via Excel (instant & scheduled payments)
- Maximum: Up to 200 payments per batch
- Supported payment types: Instant and scheduled payments
- Import via Excel (instant payments only)
- Maximum: Up to 2,000 payments per batch
- Supported payment type: Instant payments only
5.1. Import via Excel (instant & scheduled payments)
- Select Import via Excel (Support instant payment and scheduled payment)
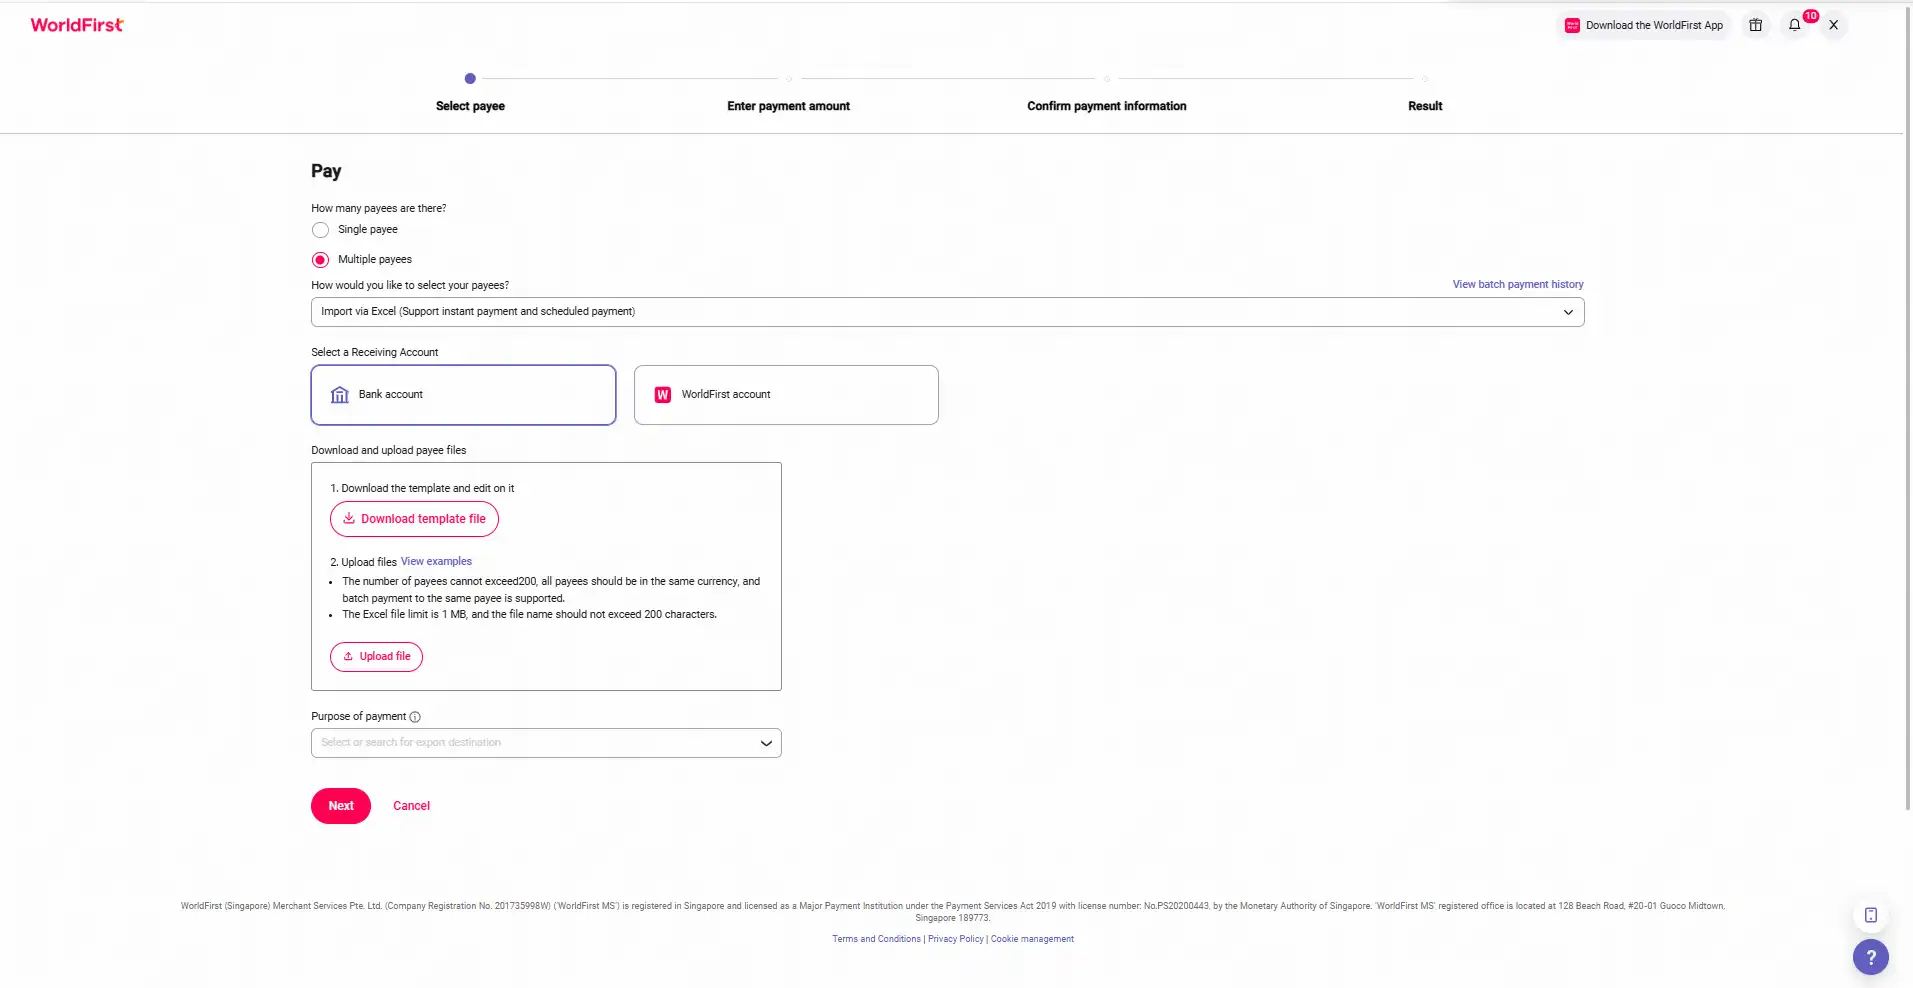
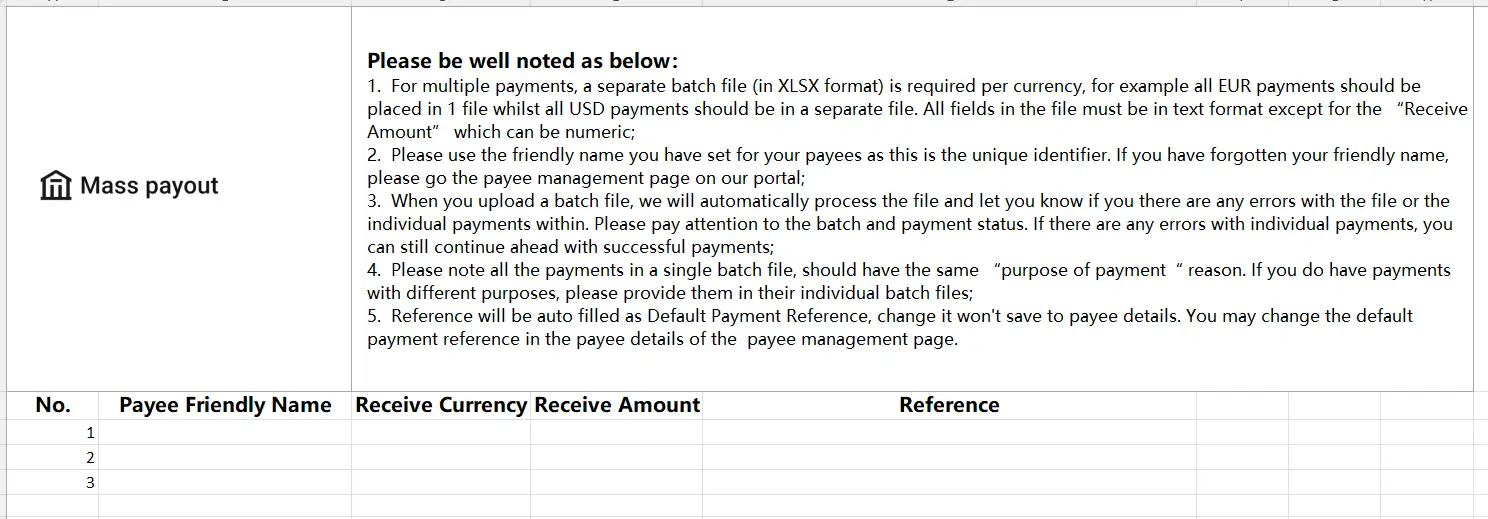
- Download the Excel template
- Enter the required payment details
- Payee friendly name (nickname)
- Receiving currency
- Receiving amount
- Upload the completed file
- Enter the required payment details
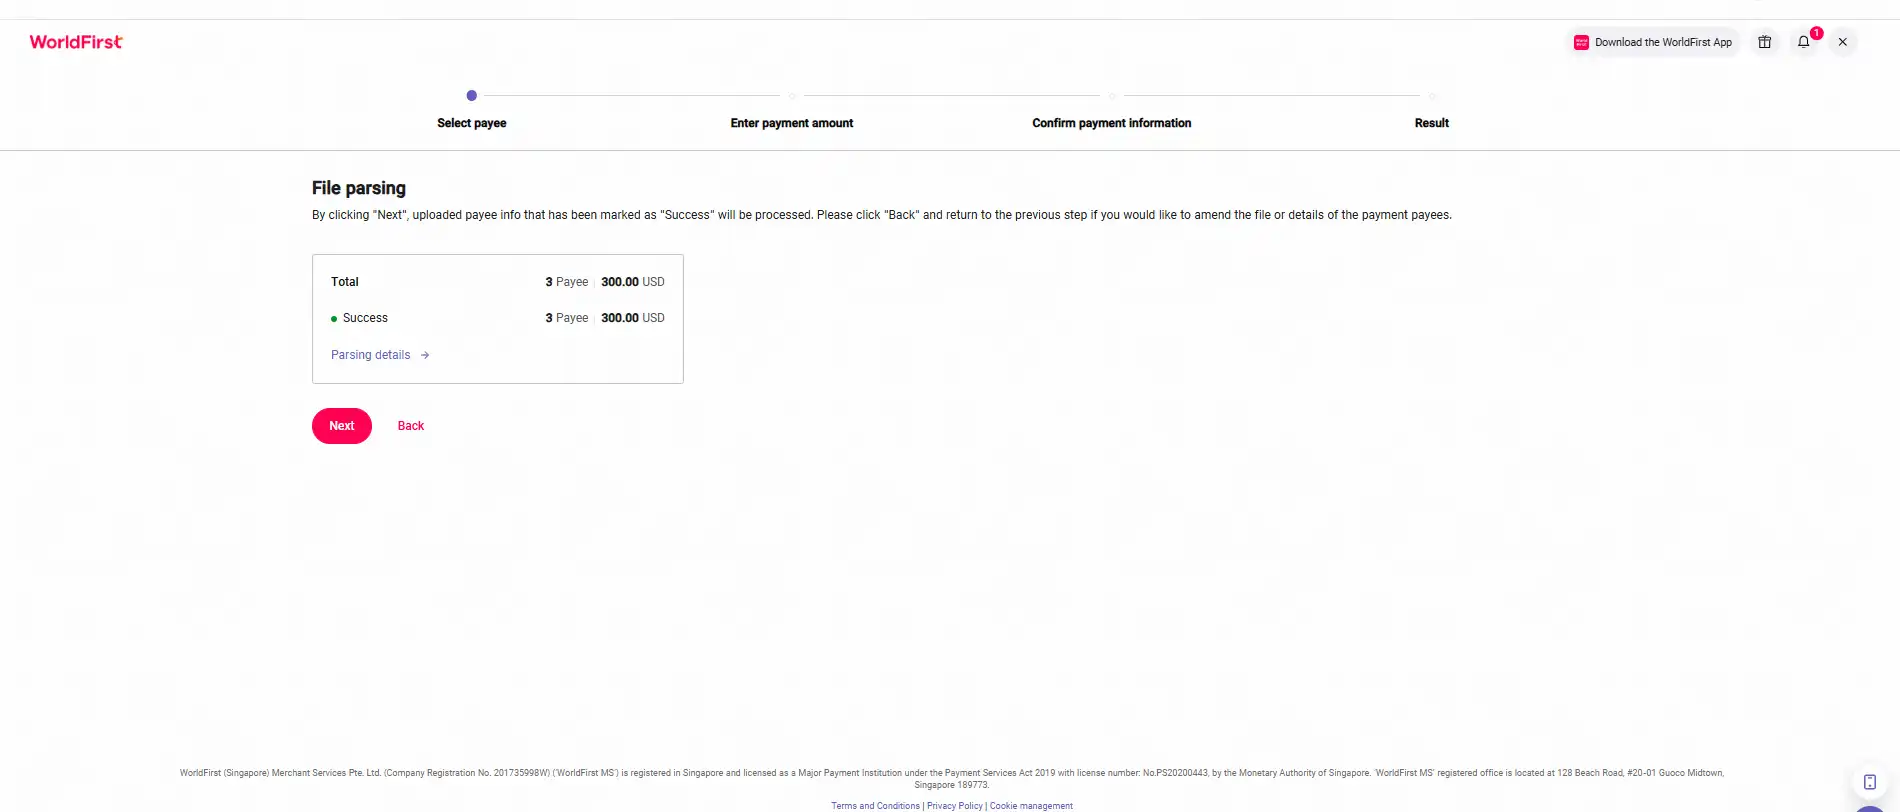
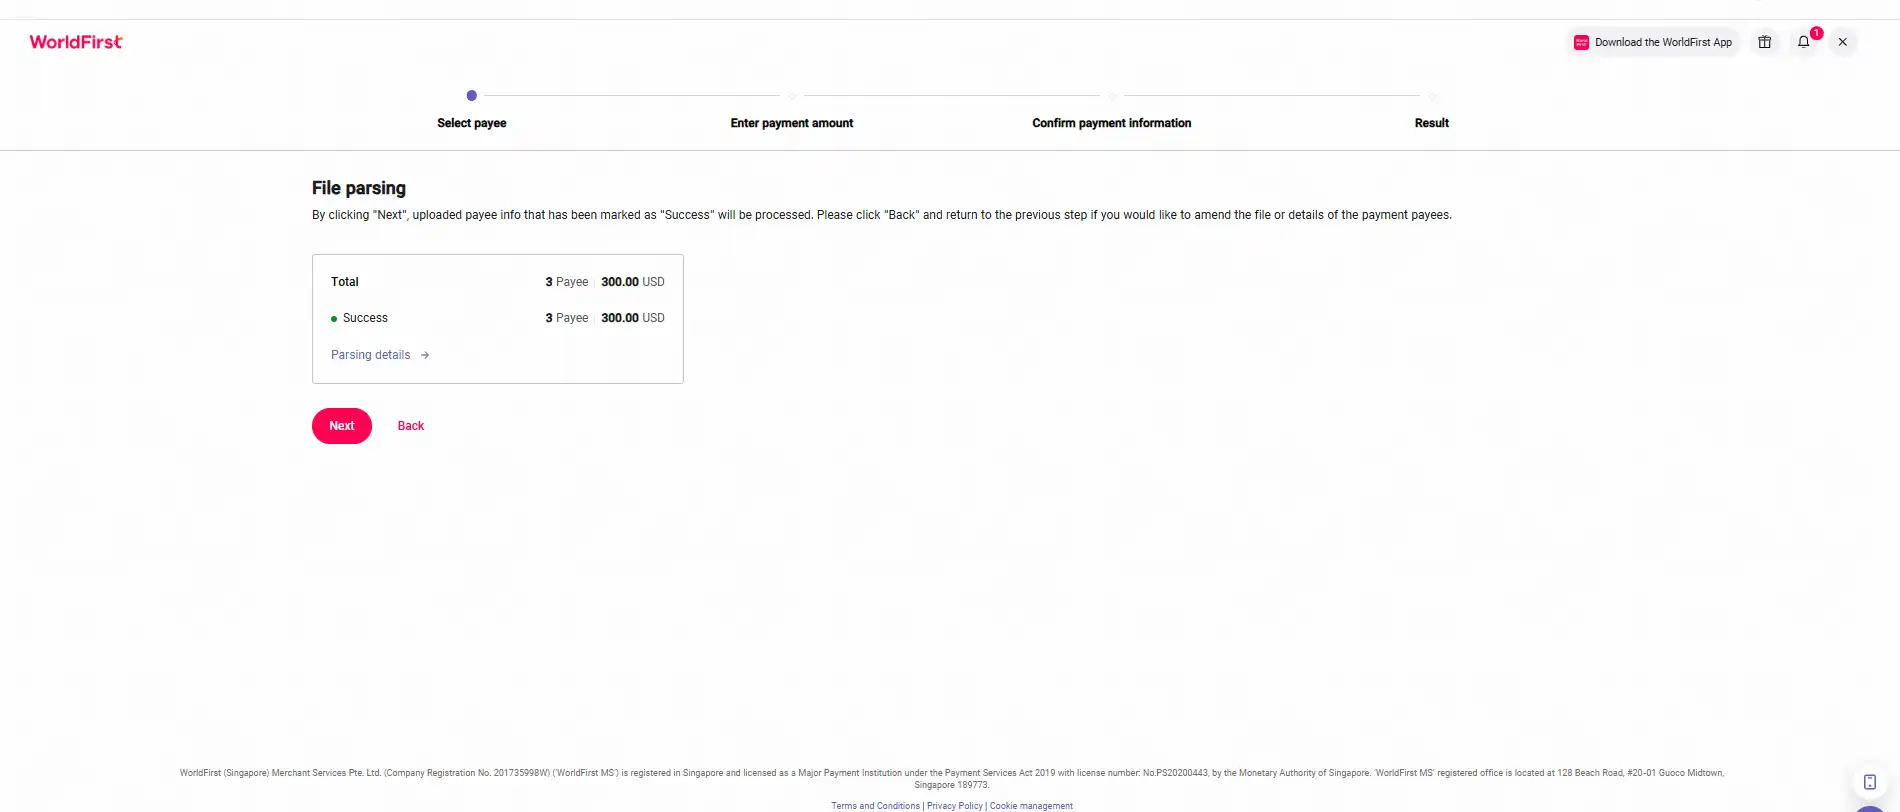
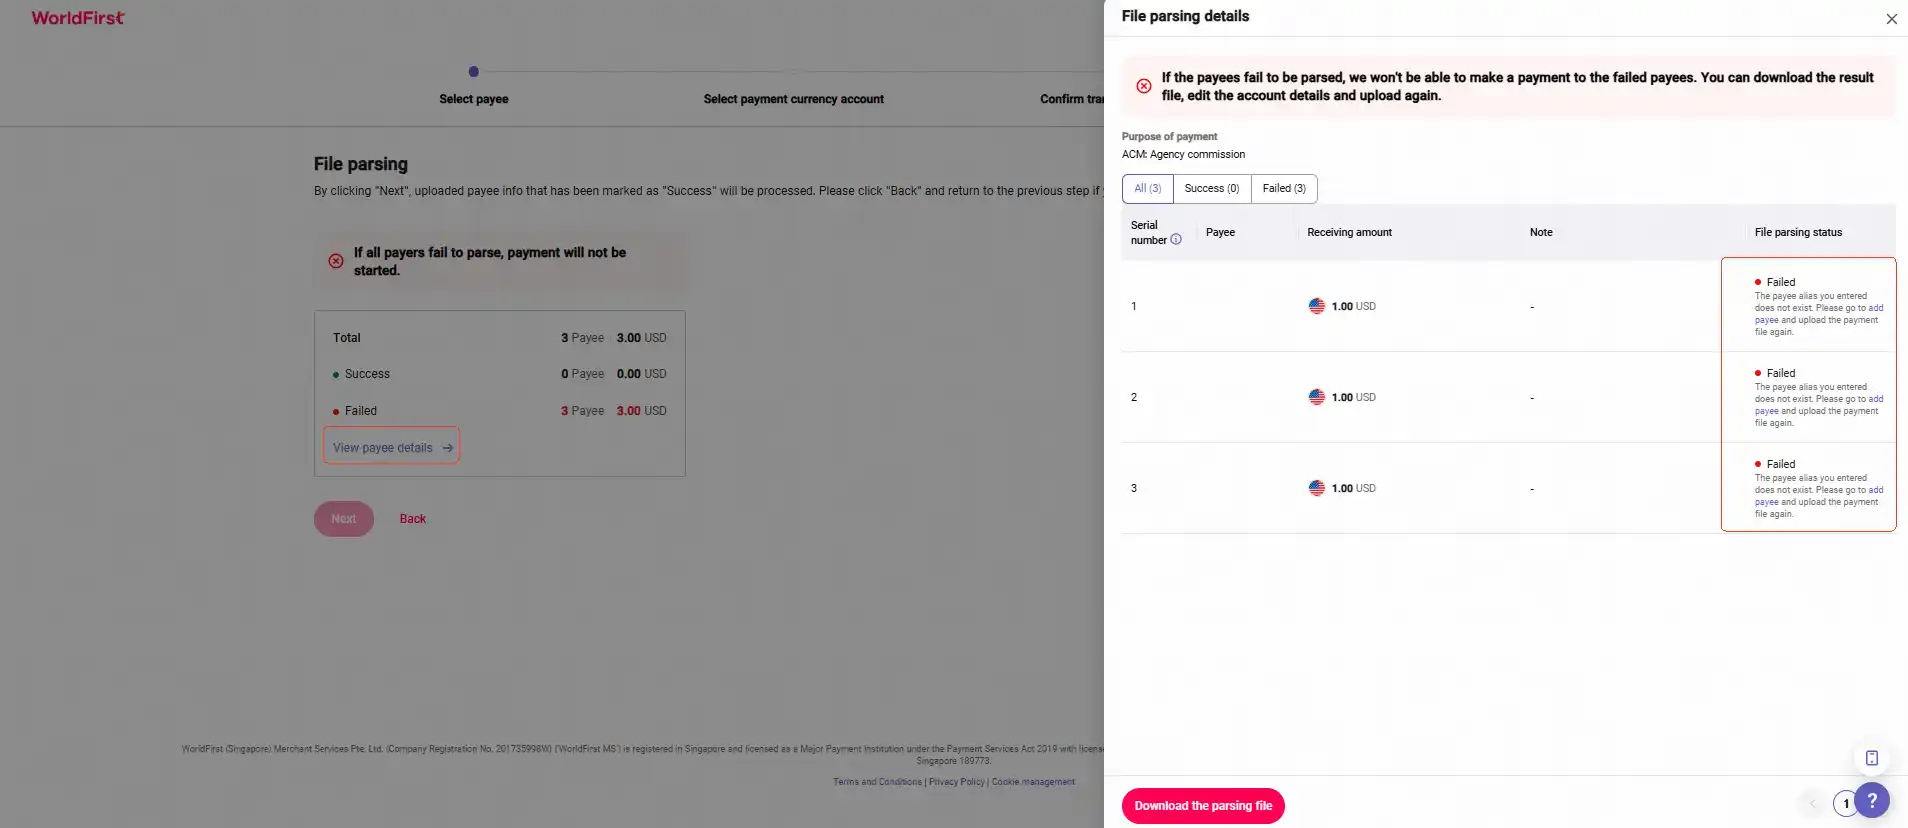
- After uploading your file, the system will automatically process and display the results
- If the upload fails, select View payee details and check File parsing status. Review the error message, correct the details in your Excel file, and upload it again
- Select:
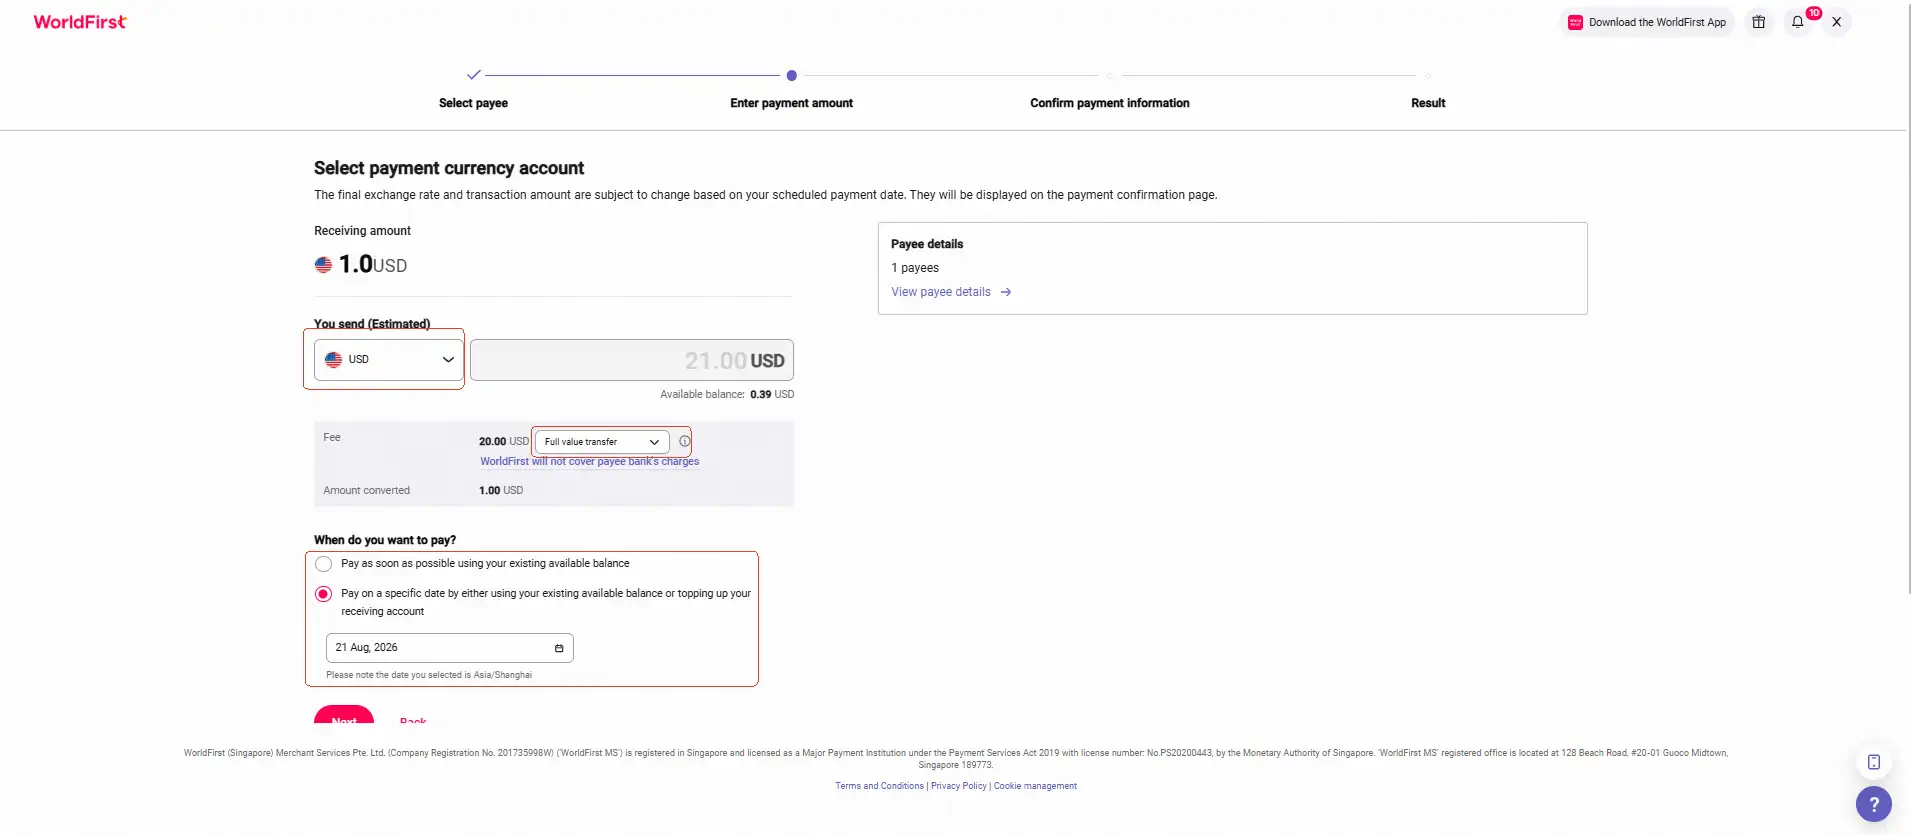
- Your payment currency
- Your preferred fee deduction method: Full value transfer or Standard transfer
- Your payment date: Instant or scheduled
- Note: For forward payments, you’ll need to pay the required initial deposit
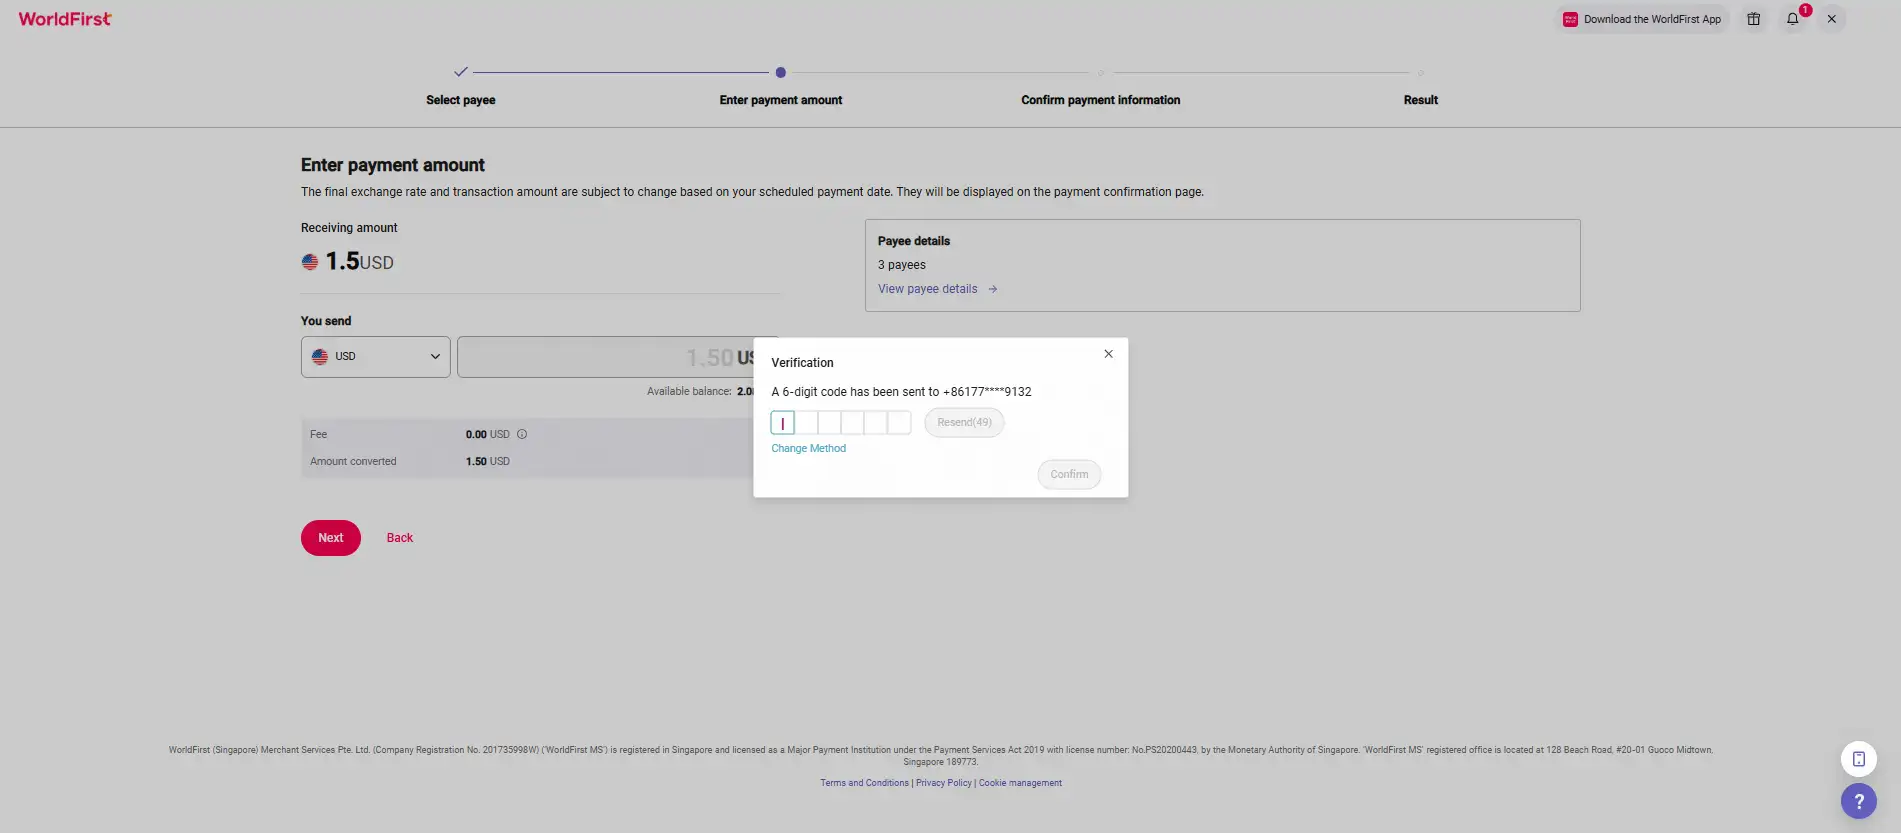
- Complete the required verification process
- Review your transaction details carefully before confirming the payment
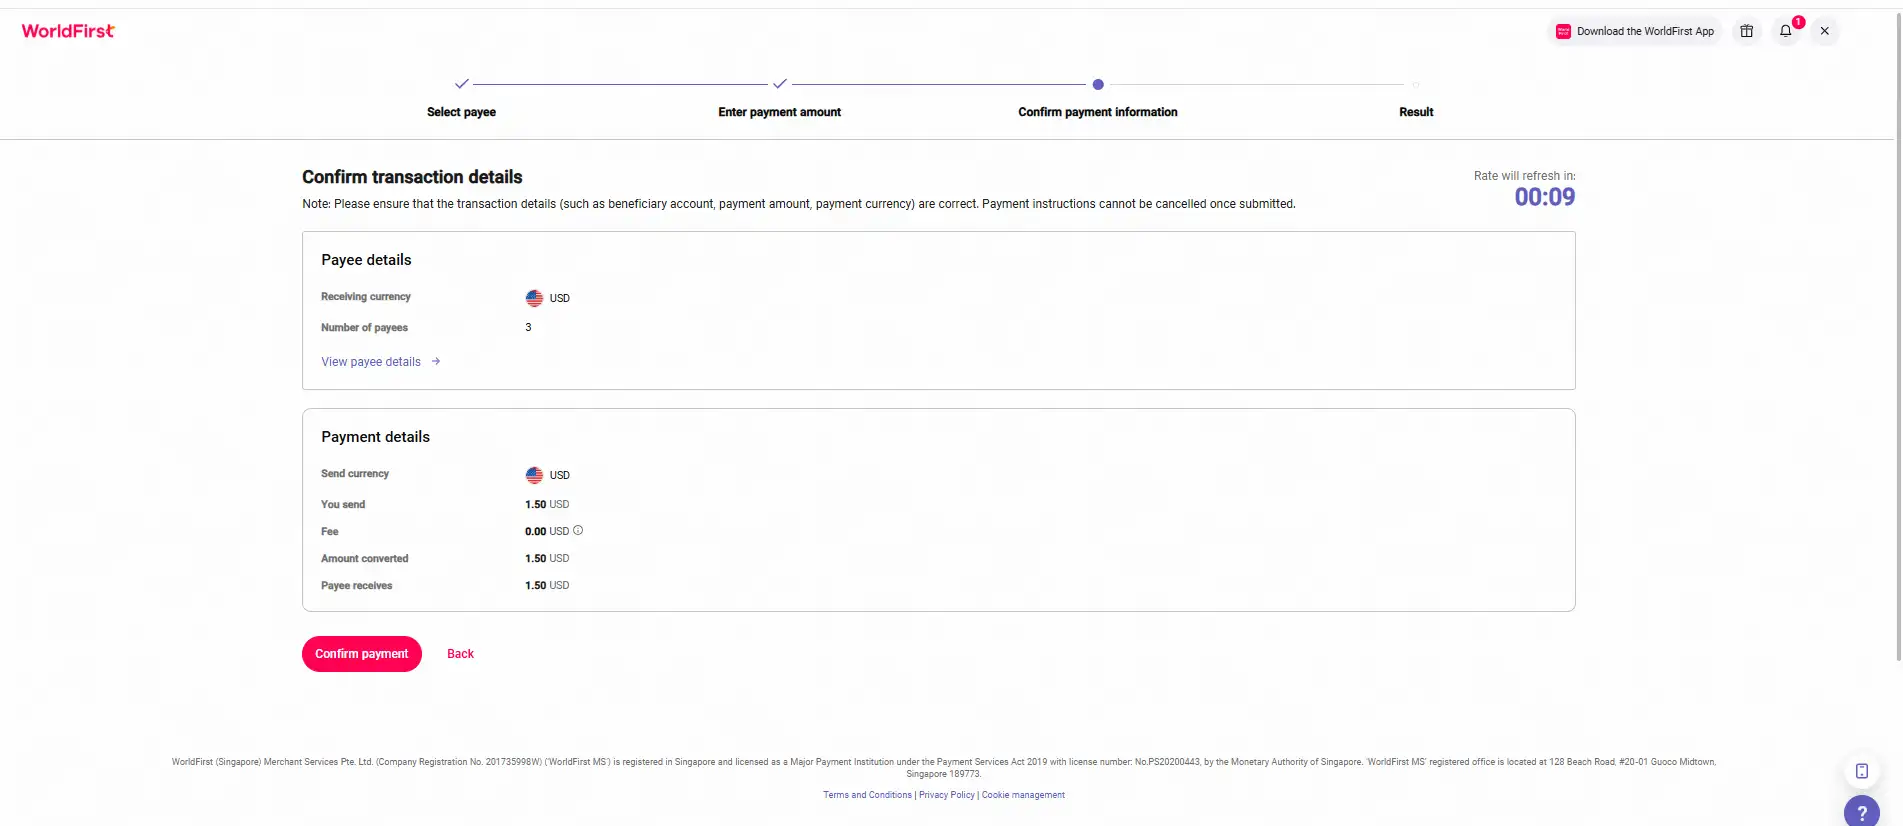
- Once confirmed, you can view the results of your payment batch
5.2. Import via Excel (Support instant payment only)
- Select Import via Excel (Support instant payment only)
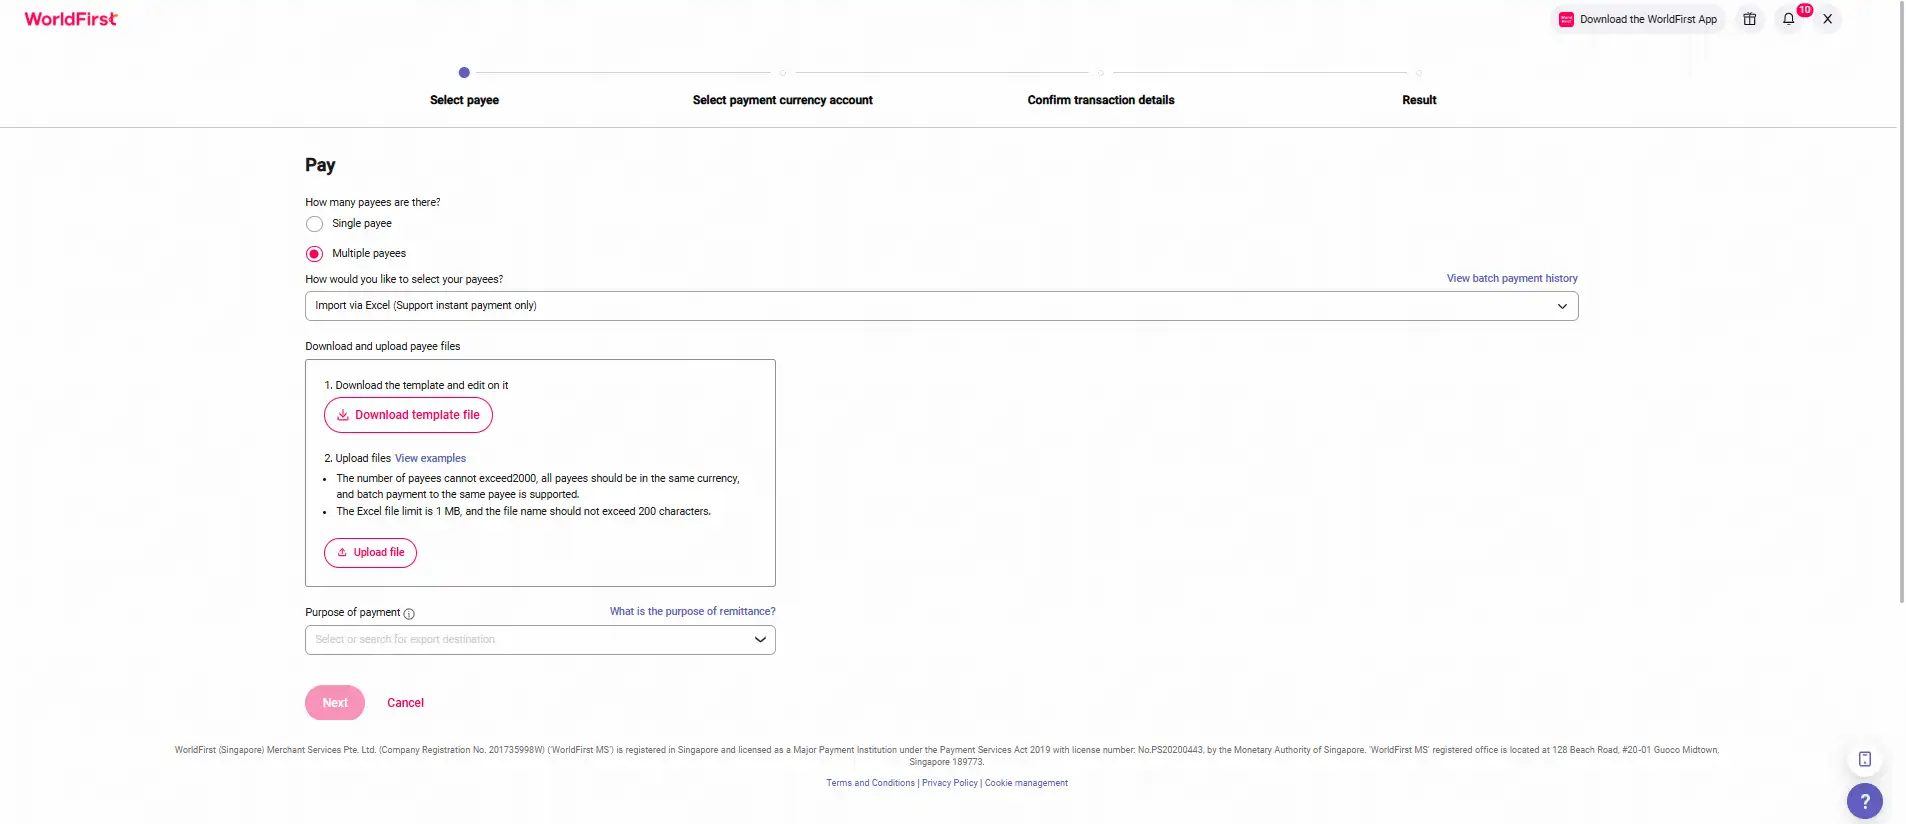
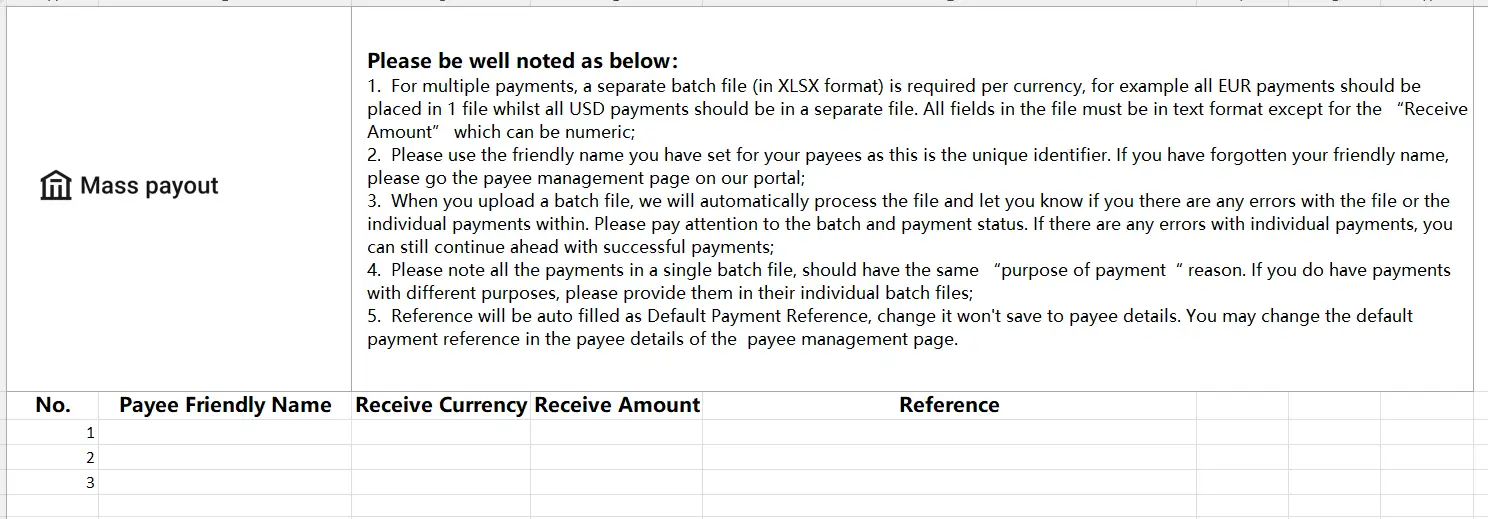
- Download the Excel template
- Complete the required payment details
- Payee friendly name (nickname)
- Receiving currency
- Receiving amount
- Upload the completed file
- Complete the required payment details
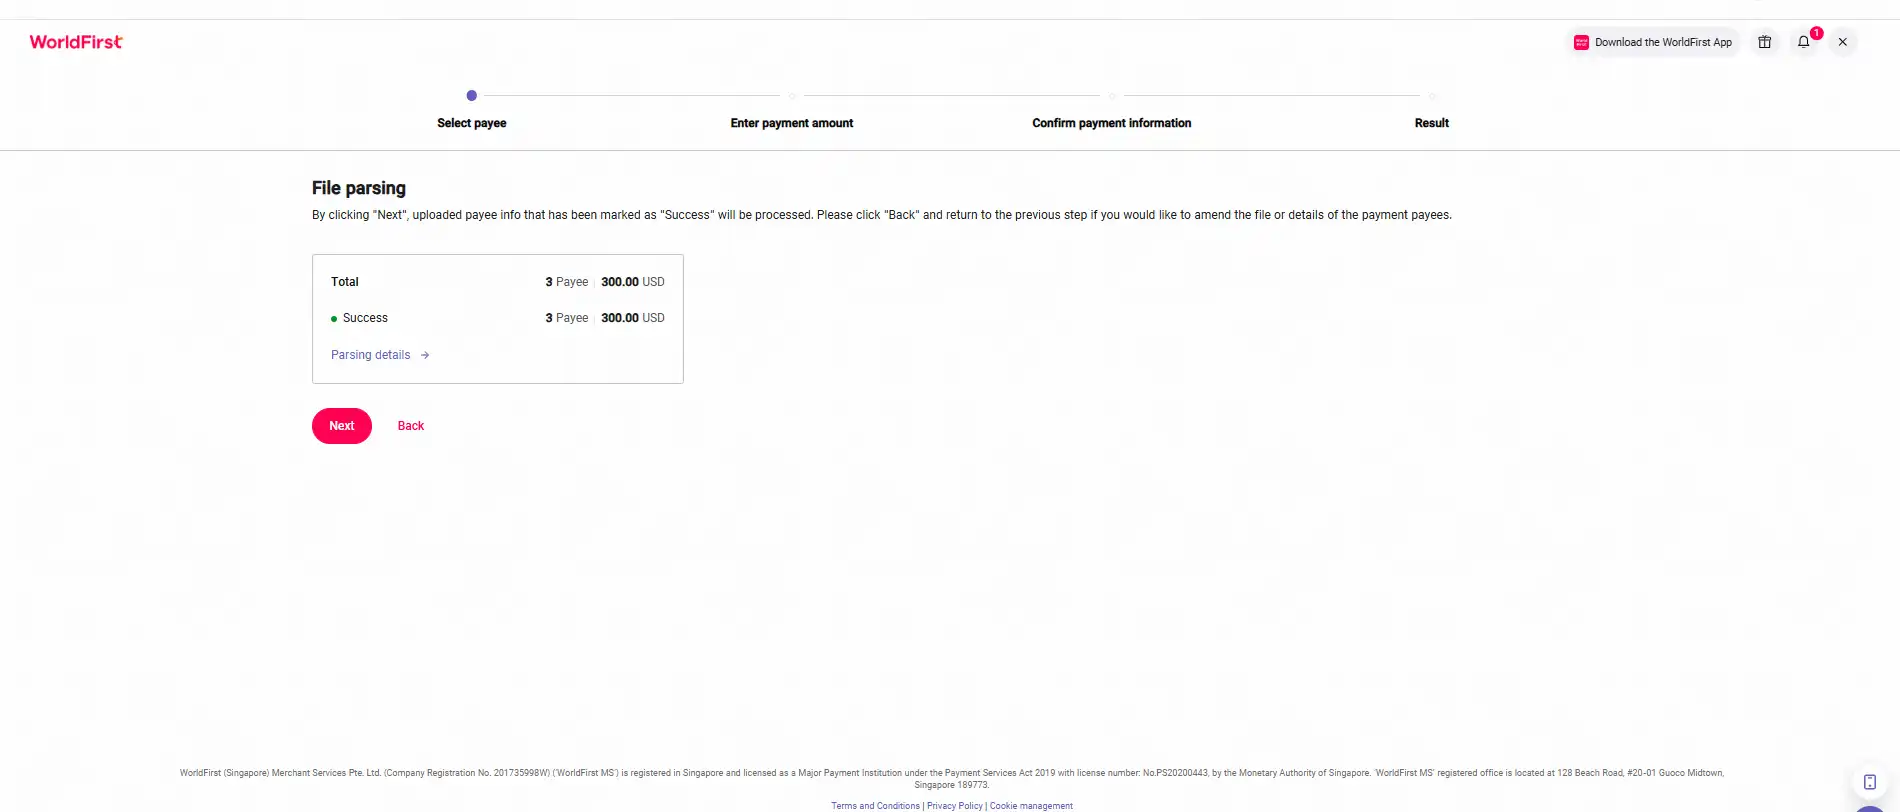
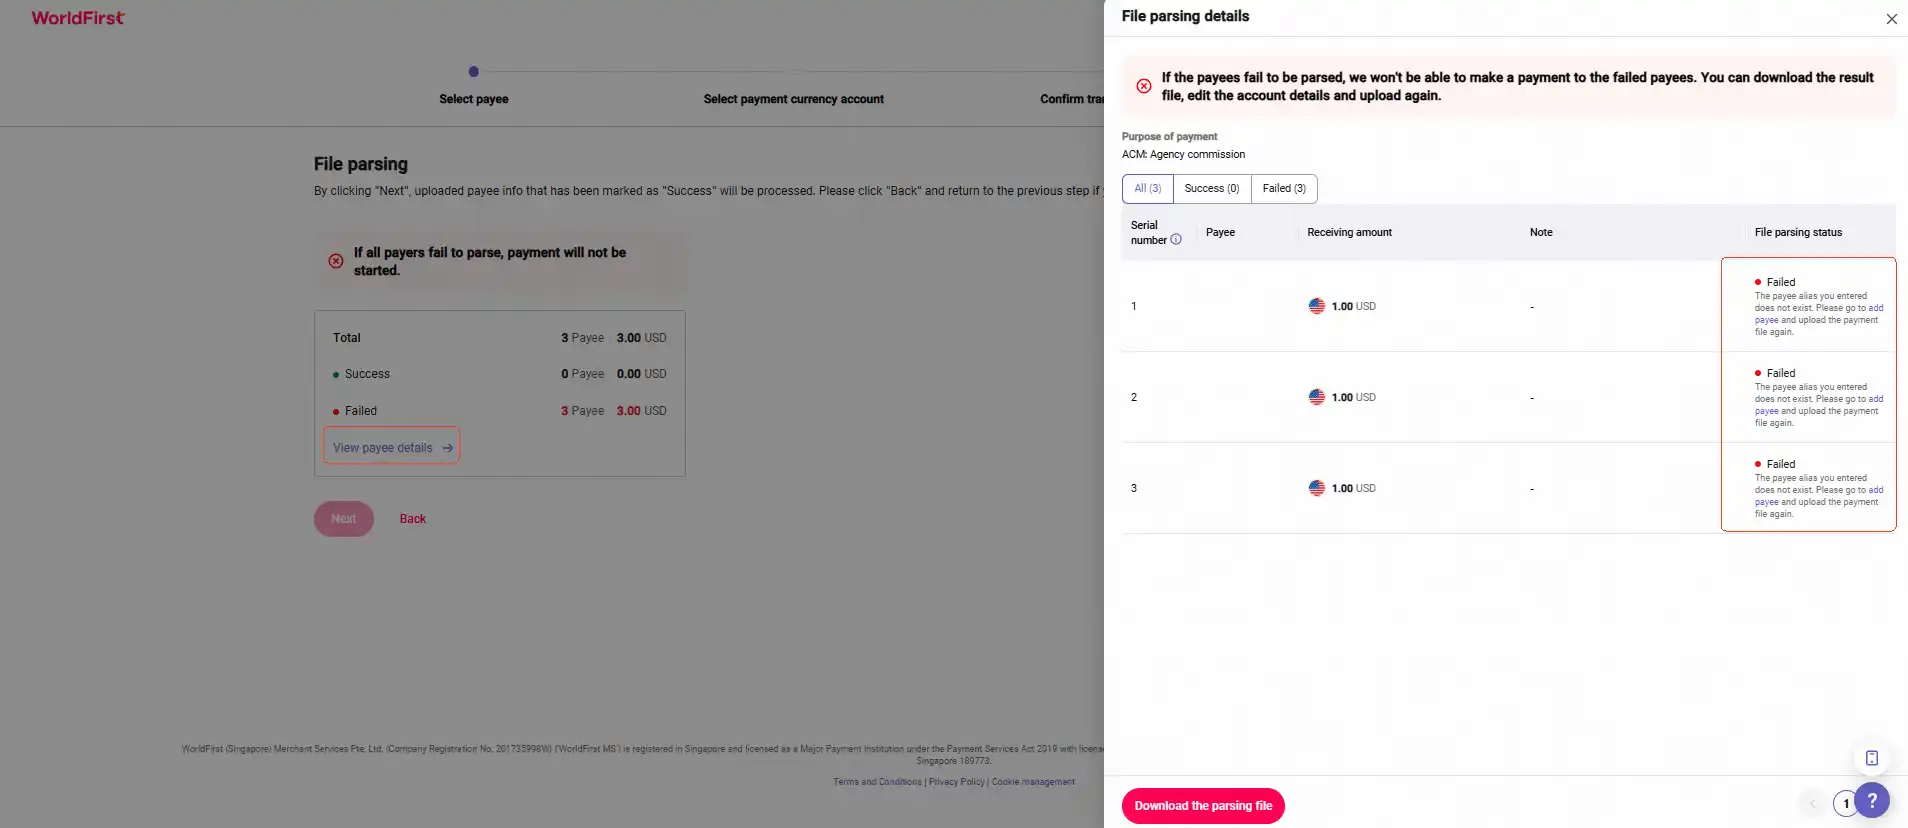
- After uploading your file, the system will automatically process and display the results
- If the upload fails, select View payee details and check File parsing status. Review the error message, correct the details in your Excel file, and upload it again
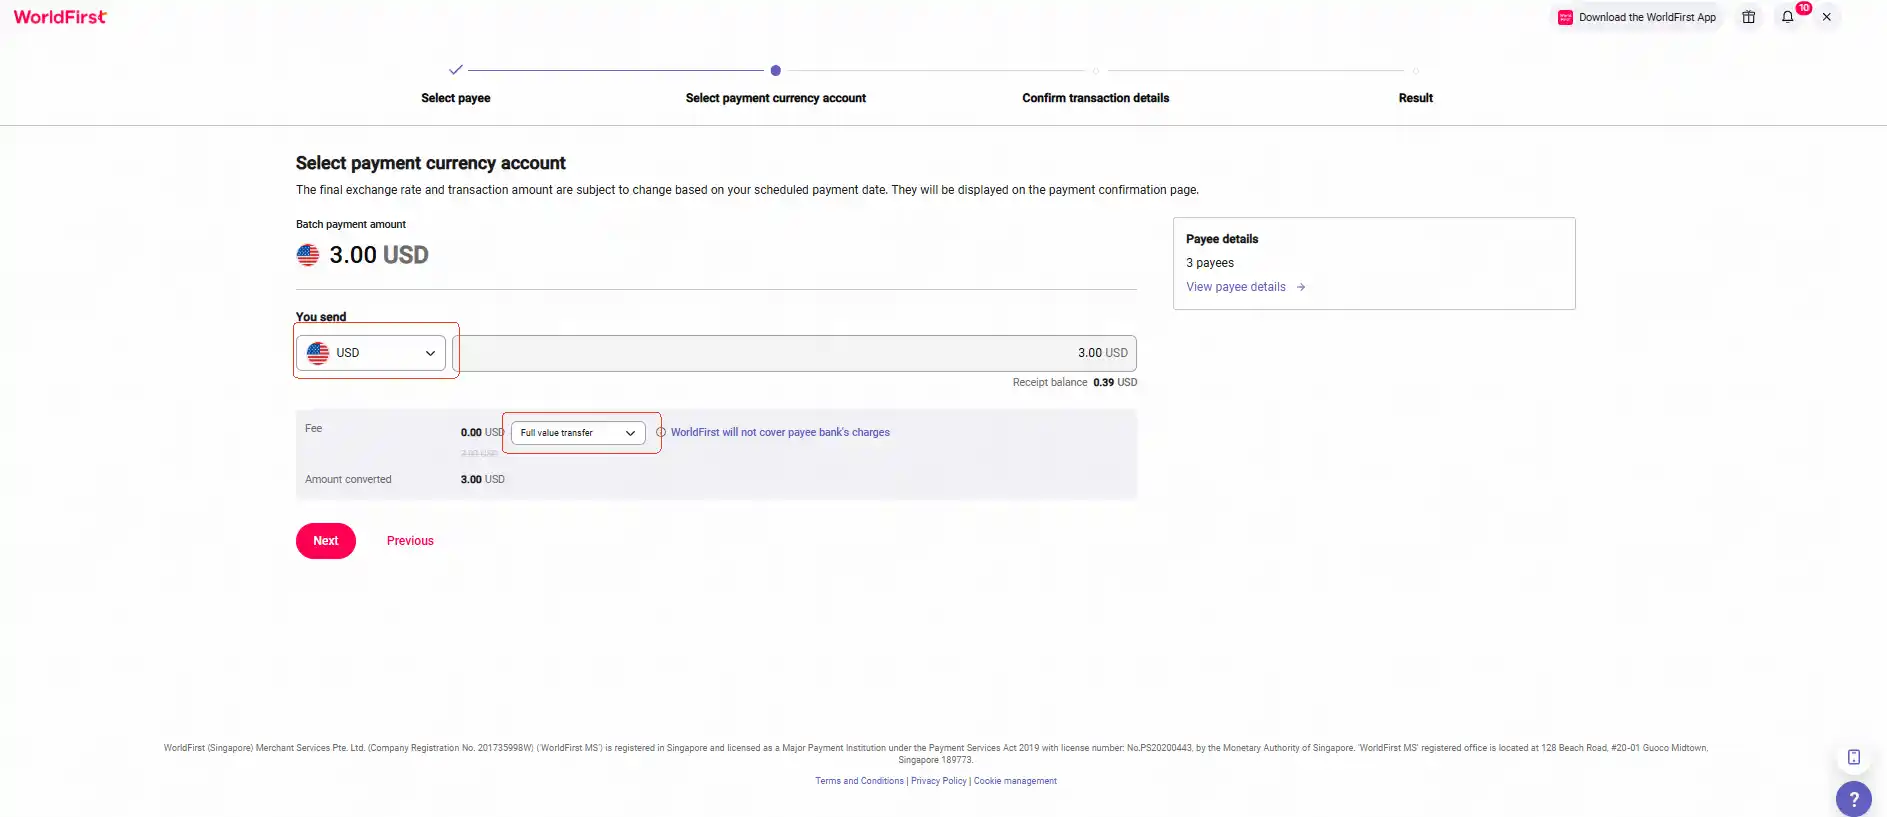
- Select:
- Your payment currency
- Your preferred fee deduction method: Full value transfer or standard transfer
- Complete the required verification process
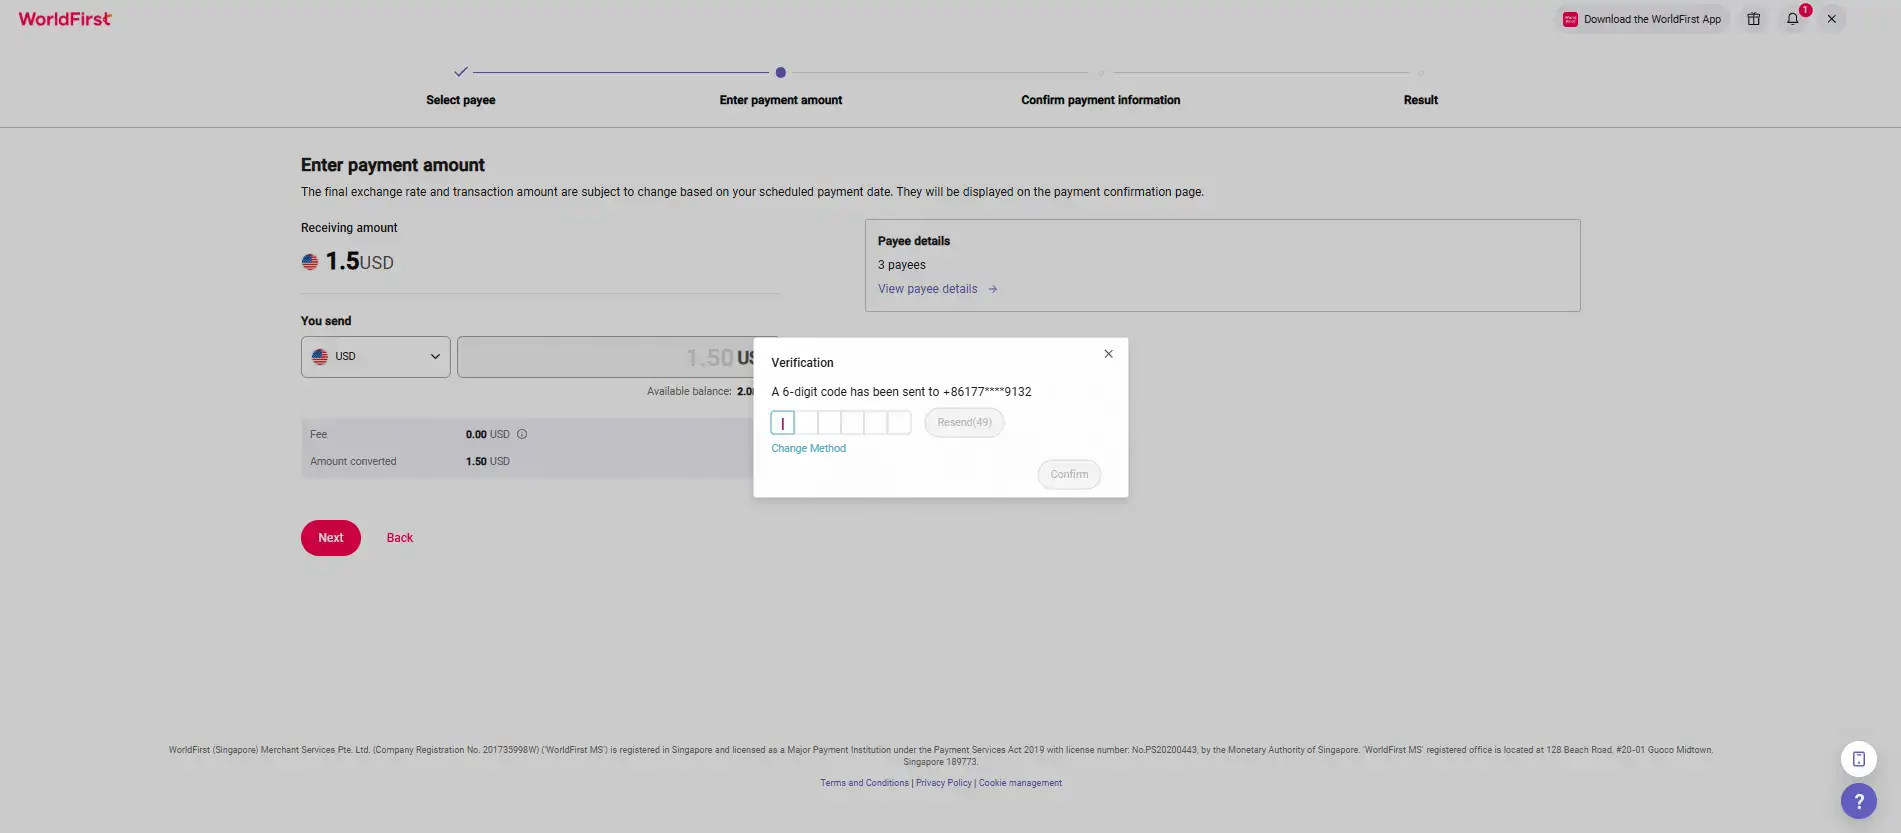
- Review your transaction details and confirm your payment
- Once your payment has been confirmed, you can view the payment results